Quantcast
Channel: Wood Trekker
Viewing all 250 articles
Browse latest View live

Bear Grylls Back on Discovery Channel

$
0
0

As you guys know, Bear Gryll’s last show on Discovery, Man vs. Wild was canceled back in March because of a disagreement Bear had with Discovery channel. He implied that they were asking him to do things he was not willing to do. You can see the original post here.

Bear_Grylls_Ultima

Well, it looks like they have patched things up, and Bear Grylls will be back on Discovery with a new show called Bear Grylls: Ultimate Survivor. The premise of the show is that they will take real survival situations that ordinary people have experienced. Bear will then be placed in the exact same situation, and he will show us what he would do in those circumstances in order to survive and get himself out. The show is scheduled to start airing later this year.

There was a very similar show a few years back that I liked a lot called I Shouldn’t Be Alive: The Science of Survival. It was an off shoot of a show called I Shouldn’t Be Alive which retold the stories of people who survived different type of situations. In The Science of Survival off shoot, an expert was placed in the same situation as the people were in one of the episodes, and explained what he would do. I hope this new Bear Grylls show is similar and not overly sensationalized.

Don’t forget, Bear also has another show in the works with NBC which should follow more of a reality show format although details are still sketchy.

He also has a new show called Bear Grylls’ Wild Adventures that airs on BBC America on Tuesday nights at 9pm. On the show Bear gets paired up with a celebrity who has no business being in the woods, and shows them how to survive.

Looks like Bear is here to stay. The premise of the new show looks very interesting. I am a big fan of survival instruction that revolves around realistic survival situations. Hopefully Bear will not squander the opportunity to show some realistic survival skills by jumping off cliffs and crawling through caves. Let’s wait and see.


Winter Clothing – The Layering Theory Revisited

$
0
0

I’ve been contemplating writing a few posts on my gear and clothing because I get a lot of questions about it, but before I do that, I wanted to go over some of the theory behind why I do what I do. In particular, in this post I want to go over my theory on clothing, and specifically on selecting cold weather clothing.

NEW 062

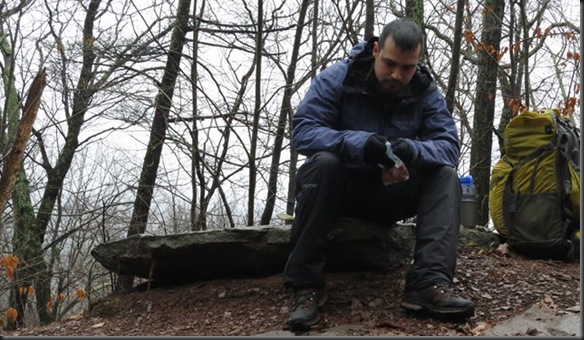
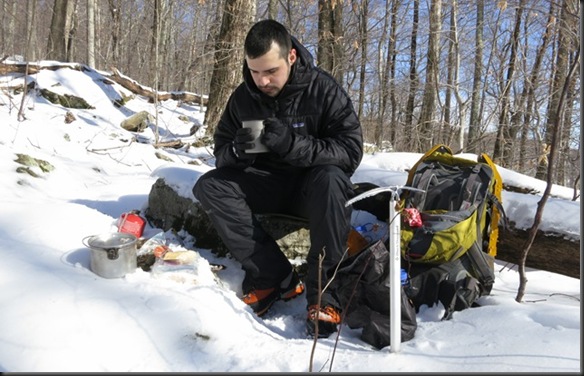
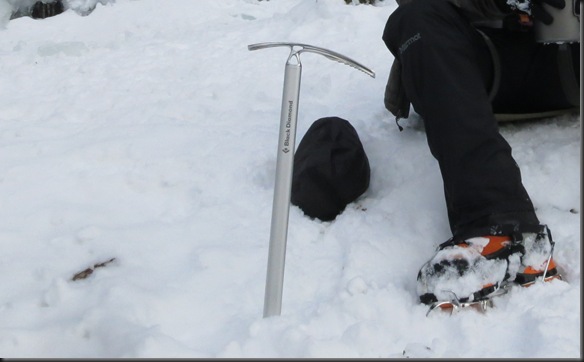
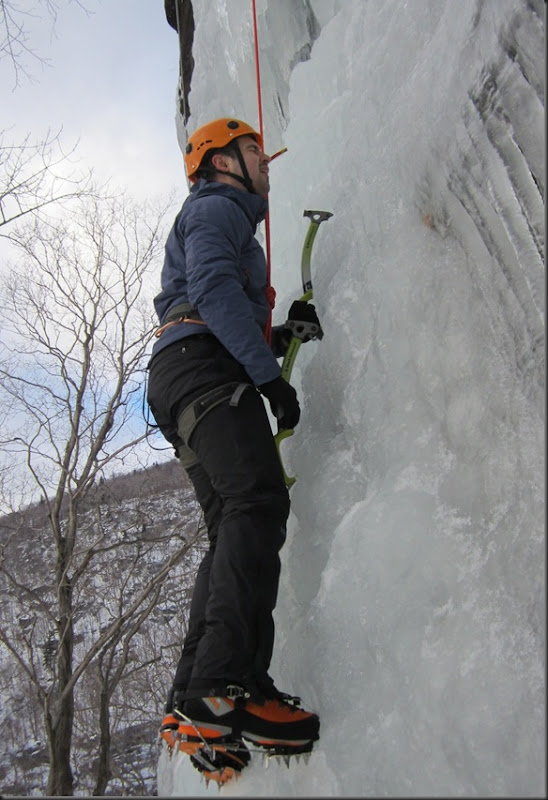
No! I didn’t stab myself in the crotch with the ice tool. My arms were just in a lot of pain so I was getting some rest. :)

For a long time now, the layering principle has been the accepted norm for outdoor clothing. The theory states that you start with a thin base layer, which is designed to wick the moisture/sweat away from your body. On top of that you have a mid layer which provides the insulation. This mid layer can be comprised of a number of different pieces of clothing until you get sufficient insulation for the environment you are in. On top of that, as a final layer, you have a shell of some sort or anorak which protects you from wind, rain, etc. In some cases you will add an over-jacket for added insulation. If you become too warm, you remove a piece of the insulating clothing. If you get too cold, you put on another piece of clothing.

In more recent years a competing approach to clothing has started to emerge. The idea is generally attributed to Mark Twight. I’m sure the approach was around before him, but he certainly coined the term in his book Extreme Alpinism: Climbing Light, Fast, & High. He called it the Action Suit principle. The two systems are nearly identical at first glance. They are both comprised of the same components, base layer, insulation layer, shell layer, over jacket, etc. The difference however comes in the realization that with certain outdoor activities, Mark Twight was talking about climbing, but I find it equally applicable to backpacking, the heat output from the human body is not constant and continuous. Unlike a regular layering system that changes insulation by increments, and requires continuous adjustment, the Action Suit theory assumes that you will experience periods of time of high exertion when you body produces a lot of heat, followed by periods of rest when your body cools down rapidly. I have found that to be very true of backpacking as well as climbing.

So, the approach focuses on creating an “action suit”, which will allow you to remain thermally neutral during periods of high activity. Just like with a regular layering system, you have a wicking base layer, an insulating layer, and possibly a shell layer to protect you from rain and wind. The insulation in the action suit is supposed to be the minimum required to keep you thermally regulated when moving. In most conditions that requires very little because even in extremely cold conditions the body produces very large amounts of heat. It is not uncommon to see people skiing to the South Pole in just a base layer. The second component of the system is a highly insulating outer layer. Climbers call it a belay jacket, but we can use whatever term we want. This jacket is put on over all of the other layers the moment you stop moving.

It is this separation of the clothing system into pieces designed for insulation when moving and ones designed for stationary activity that for me marks the Action Suit system. I think this approach more correctly captures the insulation requirements of an active person in the outdoors, whether we want to call it climbing, backpacking, or bushcraft.

There are some issues however that become evident when using this system that are often overlooked when talking about traditional layering principles. The main issue for me is storage of this second set of clothing designed for stationary activity. After all, the whole point of the system is that you are moving while wearing relatively limited and light clothing. The heavy insulation has to be stored somewhere until needed. The result is an outer layer that is light and easily compressible. Bulky and heavy parkas of decades past simply will not do. The moment you start moving, you have to remove that jacket and place it in your pack. If you can not do that, then it is not much good. The ability to pull out the stationary/heavy insulation and put it on the moment you stop moving, and subsequently take it off and quickly pack it away once you are ready to move on, and do it in an efficient and fluid manner is of extreme importance.

Very often you will see people start out into the woods with heavy outer jackets or numerous insulating layers under an oversized anorak-type shell. They are immediately limited in what they can do in the woods, or in the alternative, are planning on only being stationary in a camp site. Since they have no easy way to take off that jacket and store it in their pack due to its size and weight, they have to bring their mobility down to a minimum in order to prevent severe overheating. Anyone who has done any walking in the woods knows that even basic tasks and movement will generate large amount of heat. Alternatively having to stop and remove an outer shell just to adjust the insulation layers underneath, is highly inefficient and allows much of the stored heat to escape. When trying to put on more insulation, often times the heat lost from stopping and removing the shell layer/anorak will outweigh the warmth gained from adding more insulation.

It is important to remember that both components of the system, the active and the stationary, can be modified and adjusted for different conditions. The action suit I will use in 0F is very different than what i would use at –30F. The –30F action suit understandably has more insulation, but still just enough to keep me thermally regulated when active. Similarly the outer insulating layer can be thicker or thinner depending on what the conditions require. In warmer weather it will not be needed at all.

So, how does all of this translate into practice? Well, I’ll try to make a post about my clothing so you can see exactly what components I use, but until then, there is an excellent article by Andrew Earle called What to Wear for Winter Hiking and Climbing. In there he gives recommendations for individual clothing items. I think he is right on the money.

My Three Season Camping and Bushcraft Gear

$
0
0

It has been almost a year since I did a post about the gear that I carry. You can see that post here. Since then I’ve been getting a lot of questions about my current gear so I figured I would put together a post. This one will focus on my three season gear. By three season I mean the gear I would use for trips where the temperature will be above 32F (0C). Anything below that, and I would have to make some modifications.

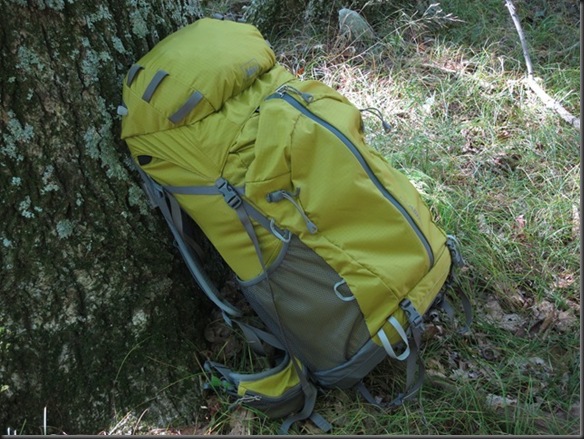
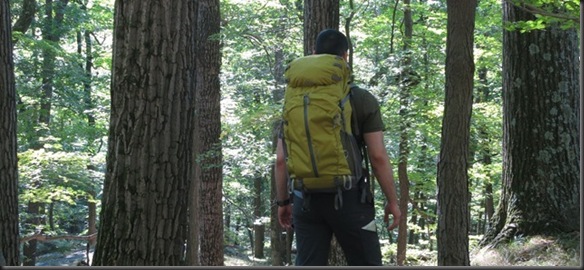
So, first, let’s start with the backpack that holds all of the gear. My current backpack is the REI Flash 62.

05333 

It is a relatively lightweight internal frame pack, weighing in at exactly 3.0 lb for the medium length pack. It has a 62 litter capacity, which is overkill for my three season gear. In fact, I use the same pack for most of my winter trips as well. A 45 litter pack would fit all of the gear you see here. The main compartment of the REI Flash 62 (excluding pockets) is about 50 litters which does the job well.

When it comes to packs, I like ones that are appropriately sized for the gear. I don’t like strapping things to the outside, hanging things to teh pack, or adding pockets, pouches or anything like that. If my gear doesn’t fit inside a pack, I get a larger one.

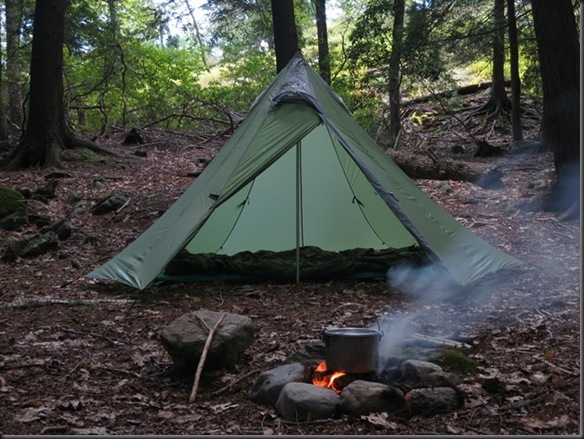
For shelter I use the GoLite Shangri-La 3 flysheet. The tent itself comes with a floor and mosquito netting which gets inserted under the flysheet, but I do not use it. The only components I use from the tent are the flysheet, center pole and the tent stakes.

16733

The Shangri-La 3, as I have it set up weighs 2 lb 3 oz. Out of that weight 11.2 oz is the center pole. Separate from that weight, I use six tent stakes which weigh a combined 5.1 oz, bringing the total of the shelter system to 2 lb 8.1 oz. I have been very happy with this shelter. I like the open floor design which allows me to treat it very much like a tarp, with the added wind and rain protection.

My sleep system is comprised of several components.

1543

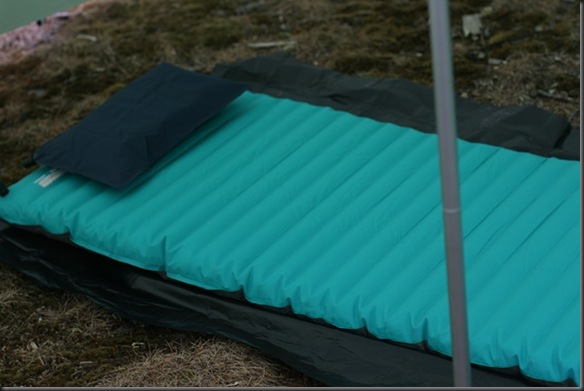
The first thing on the ground is a plastic sheet (an opened up trash bag) weighing 1.8 oz. It serves just as extra ground cover in case my sleeping bag hangs over my sleeping pad and touches the ground. On top of that I have the Thermarest NeoAir All Season Pad. It provides more insulation that one really needs for three season camping with an R value of 4.9, but I use it all year round. It offers good comfort, plenty of insulation and folds down to the size of a Nalgene bottle. It weighs 1 lb 5.6 oz. I carry a repair kit for it that weighs an additional 0.5 oz. On top of the pad I have my sleeping bag. For my three season trips I use an old green/patrol bag from an army surplus MMS system. It is not the lightest, but works well enough. I also like that I can have my dogs in there without worrying about them ruining it. The bag weighs 2 lb 5.3 oz. It is held in a waterproof Sea to Summit stuff sack that weighs 4.7 oz. The last component is a small inflatable pillow, the Kooka Bay Kookalight pillow, weighing 1.2 oz. The total weight of the sleep system is 4 lb 3.1 oz. 

This covers the big heavy items. The next one to look at is water storage and filtration.

1953

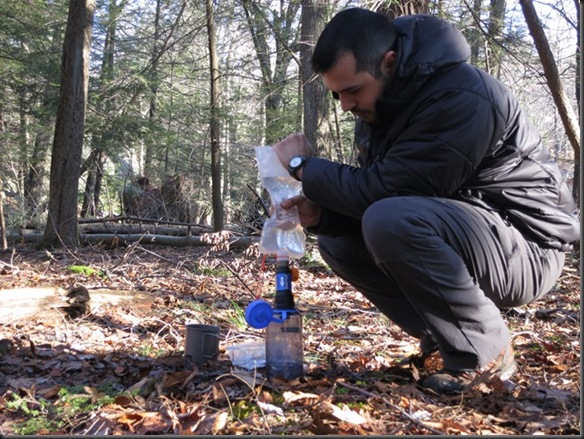
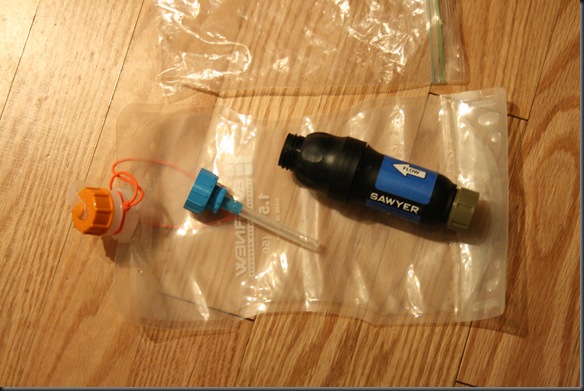
You can see most of the components in the above picture. For water storage I use one Nalgene 1L bottle and a 2L Platypus bladder. I don’t drink from it as a hydration system, but just use it for storage of water. The Nalgene bottle weighs 6.2 oz, and the Platypus bladder weighs 1.4 oz.

112

My filter is the Sawyer Squeeze Filter. I have replaced the bag that it comes with with an Evernew bladder, and have added a pre-filter and a back flush attachment. The filter itself weighs 3.0 oz. The Evernew 1L bladder where the dirty water is stored weighs 1.2 oz. The pre-filter weighs 0.2 oz and the back flush mechanism weighs and additional 0.3 oz. The total weight of the filter system, stored in a plastic Ziplock bag is 5.0 oz.

The next set of items to examine is my cook kit.

093

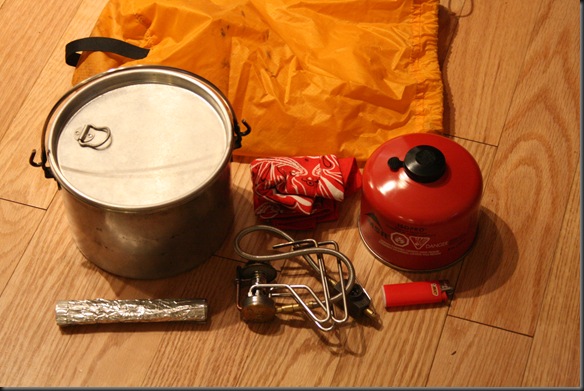
The pot I use is the Open Country 2 Qt pot. It is made out of aluminum, weighs only 7.7 oz, and is one of my favorite pieces of kit. I could get away with a smaller pot, but I like that I can boil things in it without them boiling over, and I use it in winter as well to melt snow. The stove I use is the Kovea Spider. The stove itself weighs 5.9 oz. The weight of an empty canister (since we are doing the base weight here) is 5.0 oz. With the cook system I also carry a 0.4 oz aluminum foil windscreen, a 0.4 oz lighter, and a 1.0 oz bandana. It all goes into a stuff sack that weighs 0.6 oz. The total weight of the cook system is 1 lb 5 oz.

Separate from the above cook kit I have a titanium cup that nests with my Nalgene bottle. It is the Backcountry Stoic Ti Kettle, which weighs 3.1 oz.

1493

This pretty much covers all of the large items I have and use. I also have a waterproof bag with other smaller items.

040

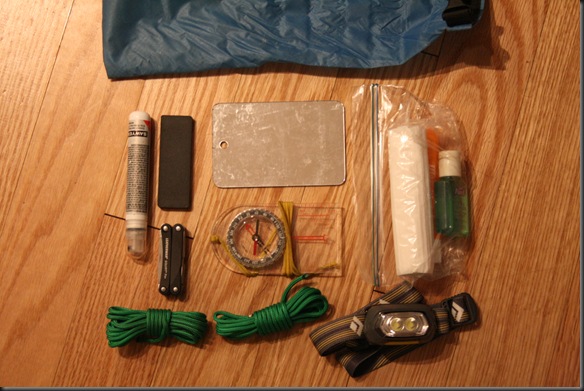
I’ll try to go through all of the items. The bag itself weighs 0.8 oz and is a Sea to Summit stuff sack. In the Ziplock bag on the left I have some toilet paper (0.4 oz, but obviously the amount varies), toothbrush (0.4 oz), and a bottle of soap, which weighs 1.0 oz when full. I also have a Black Diamond Gizmo headlamp that weighs 2.2 oz, a mirror which weighs 0.7 oz, a basic compass that weighs 1.0 oz, a DC3 sharpening stone weighing 1.3 oz, a Leatherman Squirt multitool weighing 2.0 oz, a spray bottle of DEET, which when full weighs 1.0 oz, and about 50 ft of rope, weighing 1.1 oz. The rope is not parachord, as I find parachord to be overkill as far as rope needs. The total weight of the bag with these items is 11.8 oz. 

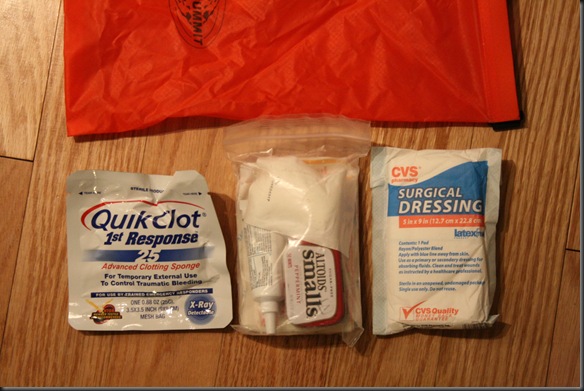
I also carry a first aid kit. It is relatively small, and is designed to deal with injuries that I may get and am capable of handling my self.

061

The kit has two components. One is designed to deal with heavy bleeding, and the other is designed for minor injuries. The two items you see on the sides are designed to stop heavy bleeding. One is a surgical dressing. It weighs 0.4 oz. The other is a Quick Clot sponge, which stops heavy bleeding by causing clotting. The sponge weighs 1.1 oz. In the middle you see a small bag with items designed for smaller injuries. It contains medications, Neosporin, gauze, band aids, etc. Including the stuff sack, the whole first aid kit weighs 5.4 oz.

The last item I carry in my pack is a Bahco Laplander folding saw.

m (3)

It weighs 6.4 oz and provides significant cutting capacity for that relatively low weight. It has come to be a fairly standard equipment choice, and for good reason. You have probably noticed that I am not carrying an axe or hatchet. I did until very recently, but these days I am trying to go without one. It just wasn’t justifying its weight. Over the years I have started using smaller and smaller fires, especially since I camp alone so much. I find that a knife and the saw are more than enough to process the firewood I need. Whenever I carry an axe, I seem to just be looking for reasons to use it without actually needing it. It is a good tool to have, but when you carry everything on your back, every tool has to justify its weight in terms of practical use, not just theoretical one.

So, when we add everything up, we get a total base weight of all the above gear of 13 lb 7.5 oz. It is not an ultralight set up, but then again, it was never intended to be one. There are a lot of items where the weight can be reduced further if you so wish. The cooking kit can be much smaller. The sleeping bag and sleeping mat can also be reduced in weight, and if you can do that, you can probably move to a lighter frameless pack. However, I carry the gear you see above because  I like it and it serves me well.

Aside from the items in my pack, I have a few more things in my pockets.

010

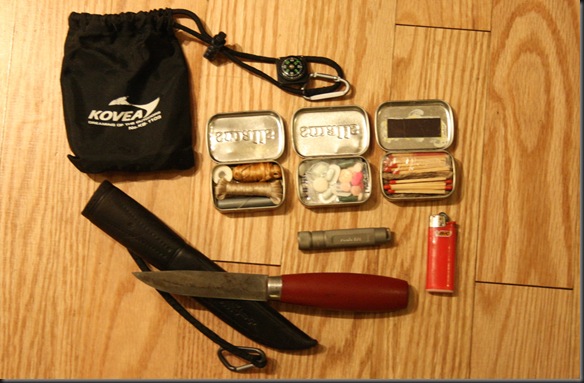
In my right pocket I carry the Mora #2 knife you see above. I keep it in a leather sheath that I got from another knife. The knife together with the sheath weighs 4.0 oz. The Mora #2 is my favorite knife in terms of blade and handle design. Its only downside is that it is not a full tang knife, so it has some strength limitations.

In the other pocket I carry a small pouch (actually from my Kovea stove), in which I keep a Fenix E01 flashlight, a mini BIC lighter, and three Altoids Smalls tins. One of the tins holds my repair kit with a few fishing hooks thrown in on the bottom. The second tin holds some medications I commonly use and water purification tablets. The third tin contains tinder (waxed jute twine) and matches. On the pouch itself a have attached a mini compass. The whole pouch weighs 4.5 oz.

033233

So, when the weight of the contents of my pockets is added to the overall pack weight, I get a total combined weight of exactly 14 lb. Of course, the actual pack ends up being heavier when we add perishable items like food, water and fuel. A full canister of gas will add another 8 oz. Each liter of water will add another 2 lb, and a day worth of food is between 1 or 2 lb. Additionally, I may have some articles of clothing which I would put in the pack when I am not wearing them – some extra insulation, rain jacket, hat, extra socks, etc. I have not included them in the base weight of the pack because they are not always in it. I will do separate posts on clothing. However, even though the clothing is not included here, the backpack itself is large enough to hold all the clothing other than what I would be wearing all the time.

That’s about it for my three season gear. It is what I would consider fairly luxurious. I certainly have not spared many comforts. The weight can easily be reduced if you are willing to sacrifice some of those luxuries. You certainly don’t need such a large pot or stove. You don’t need such a heavy sleeping pad, nor do you need such a large shelter. A down bag will significantly reduce the weight and bulk. However, each one of us has to strike that balance between how much we are willing to carry, and what items we would like to have with us. For now, this is mine.

Kovea Spider (KB-1109) Long Term Review

$
0
0

Back in July of 2012 I was contacted by Kovea, a Korean company, regarding reviewing one of their stoves that they were about to release on the market. The stove was the Kovea Spider. After a few uses, I did my initial review of the stove, which you can see here. Up through that point I had been using a MSR Whisperlite International white gas stove. The reason was that I don’t like changing stoves based on seasons, and a white gas stove was the safest bet for having a reliable stove in winter. After using the Kovea Spider however, and seeing what it can do, I decided to start using it as my main stove and see how it would perform under different conditions. In short, the results have been impressive.

1543

The stove weighs 6.0 oz, one of the lightest canister stoves on the market, and can currently be purchased from Kovea for about $52. For such a stove this is dirt cheap. Similar stoves by MSR and Primus cost over $100. This is the bargain of the year. You can buy the stoves at the Kovea eBay store here.

As a bit of an overview, the Kovea Spider is a remote canister gas stove. What makes such a stove different from a regular canister stove is that it allows the fuel to be used in liquid mode rather than just as a gas. That is done by inverting the canister after lighting the stove. A preheating tube then vaporizes the liquid fuel before burning. This mechanism allows the stove to function at much lower temperatures than a regular canister stove that relies on the fuel to be in gas form. The reason for that is that most fuels stop gasifying at below certain temperatures (usually about 20F for Isobutane, and about 40F for Butane). By inverting the canister, you can use such a stove at temperatures below 0F (-18C). I like to use MSR fuel canisters because they contain 80% Isobutane and 20% Propane. Propane remains a gas down to –40F, which means that I always have enough pressure to start the stove before inverting the canister to allow it to function in liquid feed mode.

3283

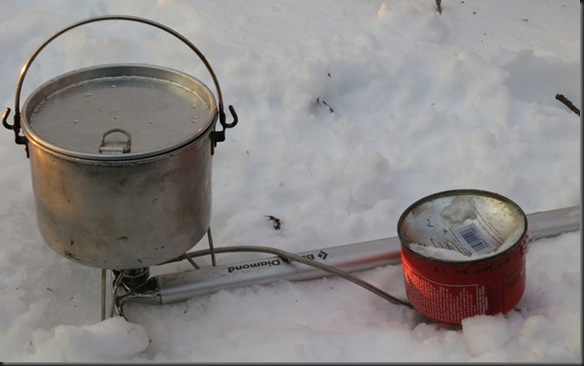
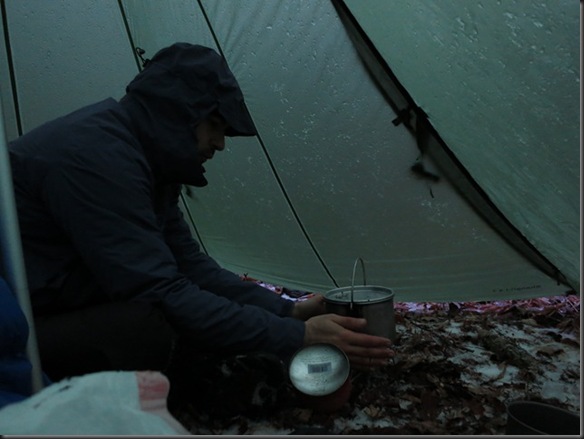
In order to see the stove in use, all you have to do is look at my trip reports. I have been using this stove exclusively for the past five months. It is powerful enough and works well enough in the cold to melt snow, while at the same time is easy enough to operate inside my tent (do at your own risk).

4683

The construction of the stove is excellent. The legs are solid and lock into place. The fuel connection is solid. The design of the valve makes it easy to invert the canister. The stove keeps functioning in cold conditions even when the canister is nearly empty. From a design and construction stand point, I can not say anything negative about it. The more I use it, the more I like it.

110 - Copy[3]

One thing to keep an eye out for though is to make sure that the stove is properly primed when you are using it in cold temperatures. I have successfully used it at –10F (-23C), but you have to let the stove burn with the canister upright for about thirty seconds before inverting so that the preheating tube warms up. If you don’t you will get flair ups much like you would with a white gas stove that has not been adequately primed. The flair ups are smaller than those you get with a white gas stove, but they can be easily avoided all together by properly preheating the stove before using it in liquid fuel mode. Also note, that while the stove works at low temperatures, it does not put out as much heat as some of the white gas stoves currently on the market. If you are melting large quantities of snow, it will take you quite a bit longer than it would with a stove like the MSR Whisperlite.

4593

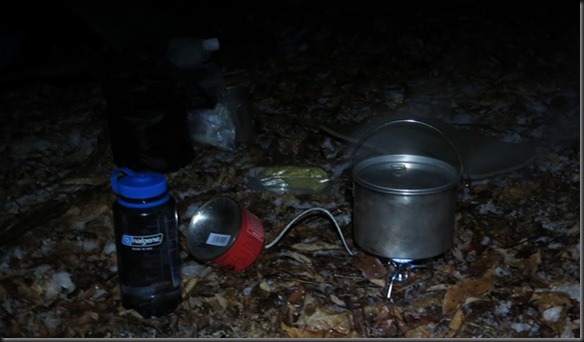
I know that I am not using the greatest of pictures in this post, but as a long term review, I wanted to show you the stove in use under some real, and less than ideal conditions.

4923

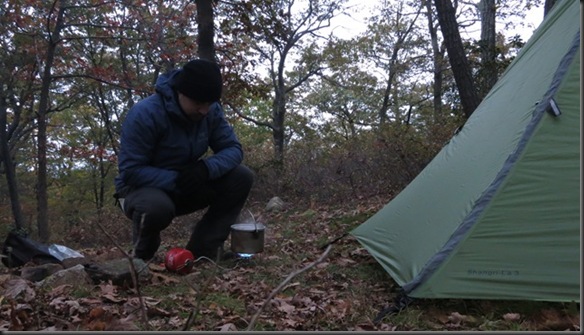
Overall, this is one of the best pieces of gear that I own. It has performed very well under a wide range of conditions with zero fiddle factor. As you can see from the picture the stove is powerful enough for me to not even bother with a windscreen (you should use one to increase efficiency). It is incredibly easy to use, and has no unnecessary features that can fail. For $52, in my opinion, it is one of the best stoves on the market. In fact, I would go as far as to say that even for $100 it would still be one of the best stoves on the market. Of course, others spend more time testing stoves may have different opinions on the subject.

Trip Report: Echo Lake 2/23/13 – 2/24/13

$
0
0

We only have another month or so of winter left, so I have been trying to make the most of it before the weather warms up. This past weekend some friends and I had planned on going ice fishing. More precisely, they were going ice fishing, and I was going along with them since I don’t know what I’m doing. To my surprise, Saturday morning, just as I was getting my gear in the car, I got a call from them telling me they were bailing out. The weather report was for rain and/or snow the whole weekend, and that wasn’t their idea of fun.

Since I was already geared to go, I decided to make a quick change of plans. I looked at my maps, and quickly planned out another trip. Some time ago I had done a trip with the AMC where we passed some ruins of an old building. At that time we continued on through the mountain range. However I remembered that to the west there was a small lake, one of the few in the Catskills. It’s called Echo Lake. I decided that for my trip I would hike out there, spend the night by the lake and then go back. It would be an 8 mile round trip, over fairly easy terrain. So, I hopped in the car, and two and a half hours later I was at the base of the mountain.

When I got there, I looked at the weather conditions. I had brought my snow shoes with me, but looking at the snow cover it didn’t seem deep enough to require them. I decided to leave them in the car.

016

The temperature was in that horrible range right on the edge of freezing. It was cold enough for the snow to stay on the ground, but it was soft and hard to walk on. It was snowing/raining. It seemed like ice. It would stick to the trees in the form of ice, but would melt on my clothing.

132

138

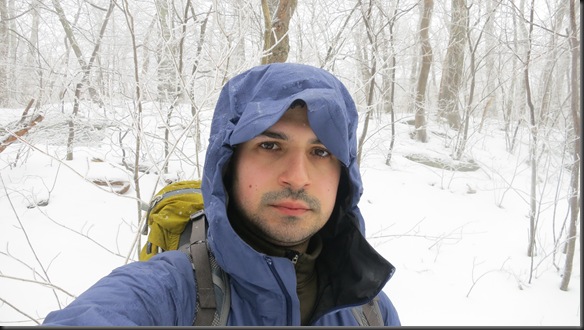
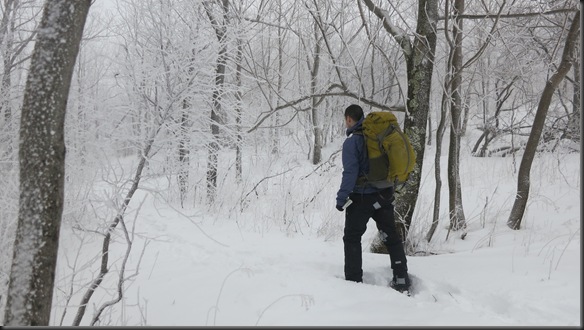
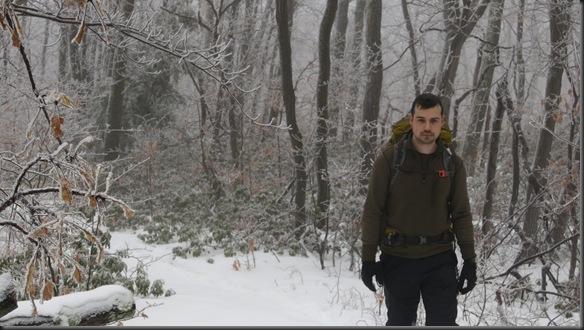
I had to wear my shells for most of the trip, which I generally don’t like to do. By the way, if my face look weird, it’s because I had three of my wisdom teeth pulled out that Monday, so I was still a bit swollen on one side.

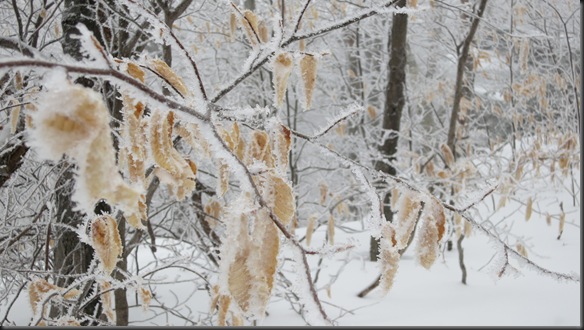
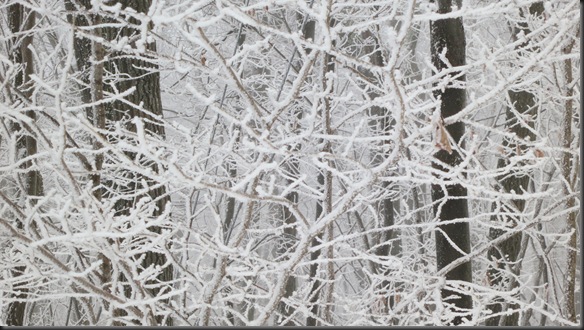
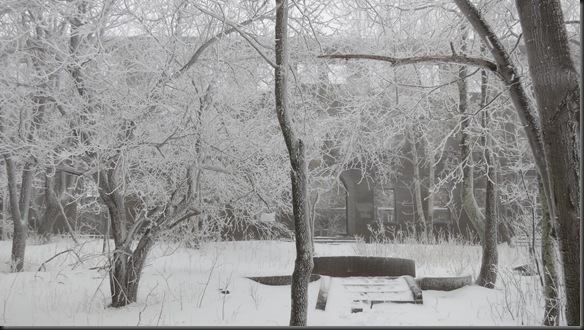
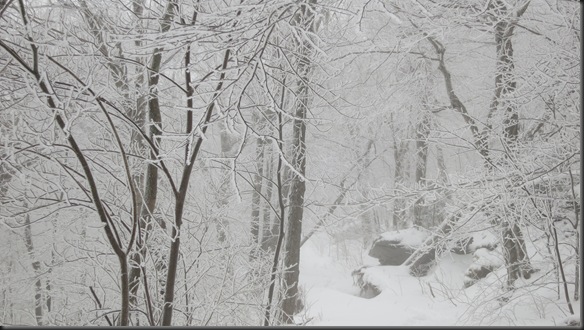
Anyway, the snow/ice/rain was sticking to everything, covering all of the trees and branches with a coating of ice. This wasn’t the type of snow that you can just shake off the tree. It was solid ice covering everything. Starting fire in this weather would definitely require some wood processing.

127

048

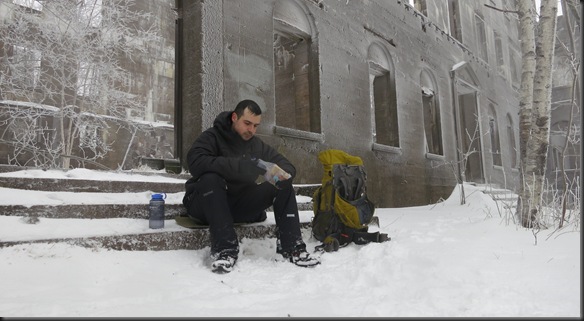
The traveling wasn’t hard. The elevation change was continuous and gradual. Enough people had passed this way so that the snow had been compressed and walking was not much of a challenge. By noon I had already reached the ruins which marked the half way point of the trip. I know I have shown you photos of them before, but I figured I would show you some more in the snow.

060

063

067

Since it was noon, I figured this would be a good place to stop for lunch and to take my pills (a mix of pain killers and antibiotics, courtesy of my dentist).

084

When I was finished, I took the detour to Echo Lake. I imagined that it would be a popular destination, even in winter, but apparently I was wrong. There was only one set of footprints, and looked to be a week old. As a result, none of the snow was compressed, and combined with the higher accumulation at this elevation, I started sinking in immediately. I regretted leaving my snow shoes in the car. At places it wasn’t bad, maybe ten inches or so of snow, but in other locations it was knee deep. After a while there were no tracks at all. It looked like I was the first person to go to the lake from this side of the mountain in a while.

110

You could still see that there is a trail cut through the woods, but no one had used it in some time.

117

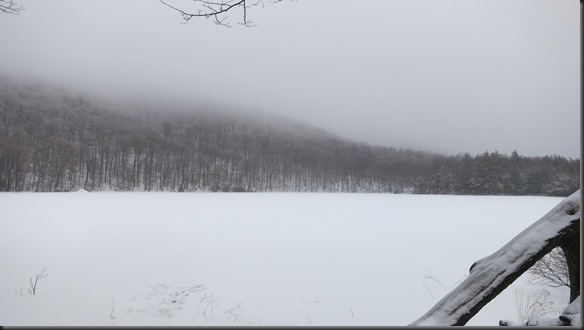
After a few more hours of pushing through the snow, I reached the lake. Luckily, most of the way was down hill. I tried to leave good tracks which I could follow out the next day assuming we didn’t get any serious snow. By the time I reached the lake, much of the mountain was covered in fog.

161

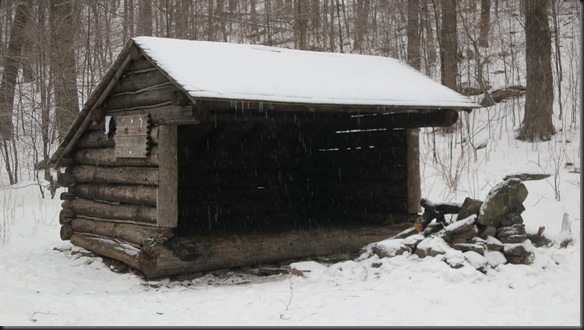
There was a decent lean to shelter by the lake. I don’t like to use them, and prefer to set up my own site away from people, even though the fire place was tempting.

145

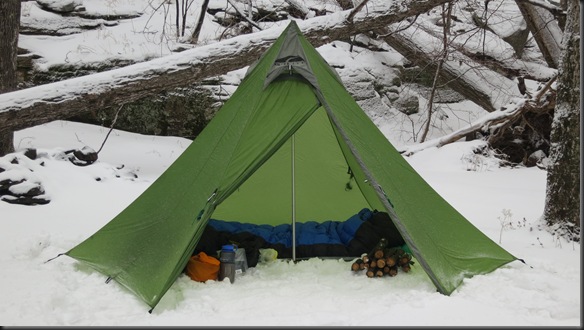
I kept going alongside the lake until I found a good location a bit further up the mountain where I could set up my camp. When the tent was up, I started gathering some firewood which I stored in the tent.

202

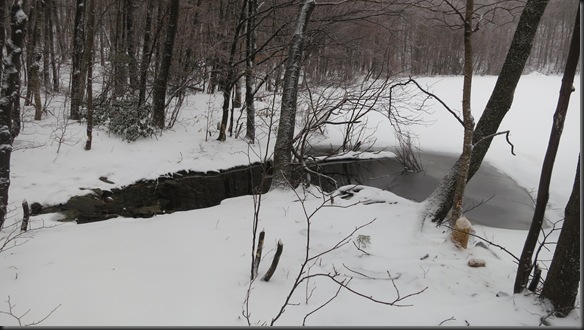
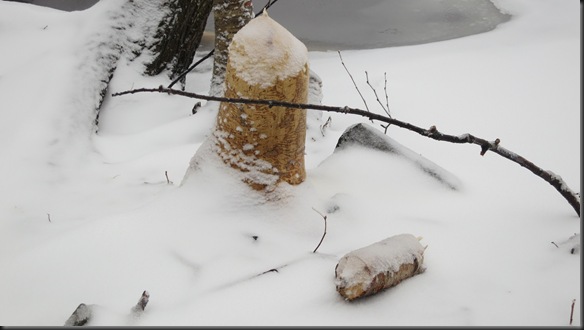
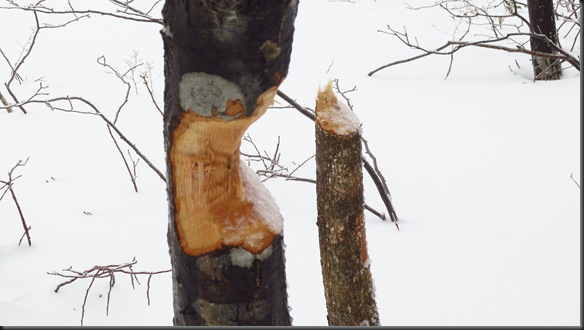
I wasn’t planning on a large fire. I usually don’t these days. I just wanted enough to use for melting water and for some warmth for a few hours. Since this area had only hardwood, and it was all covered in ice, I knew I would have to split some to get a fire going. I hadn’t brought my hatchet, so I was limited in the size of wood I could effectively process. Luckily there was some birch by the water, which would make the job easier. There was also ton of beaver sign.

187

190

182

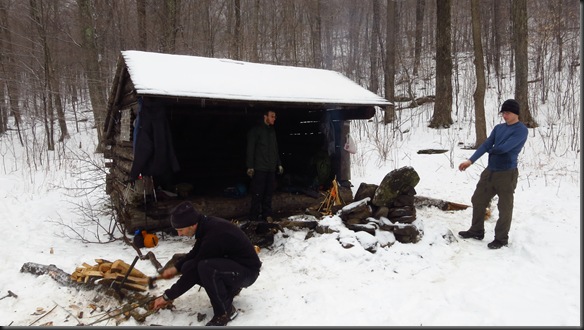
As I was continuing to gather fire wood, I heard some voices in the distance. They seemed to be coming from the lean to shelter. I made my way back there and saw a group of four guys setting up there. We introduced ourselves, and it turns out they had come from the other side of the mountain and were staying there for the weekend. After talking for a bit we decided to just make one common fire at the shelter that we could all use in the evening. The company was appreciated.

217

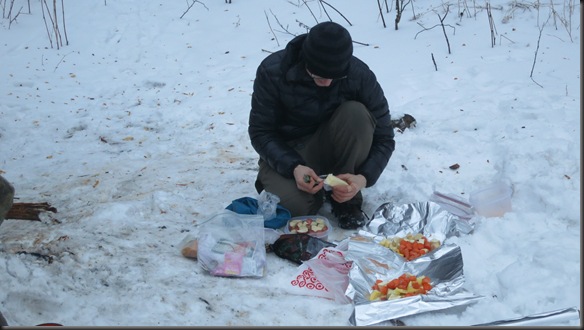
The guys had brought an insane amount of food with them (well, one of them had), which he proceeded to prep for grilling on the coals.

222

After splitting some wood we got the fire going. One of the guys had brought a Roselli hatchet, which worked well in that role. It’s not something I would want to carve or chop with, but it splits like a mini maul.

226

The grilling soon began, and we spent a large part of the evening just killing time. I have to say, these were some of the best ribs I have ever had, and I have no idea how he managed to cook them that well on a camp fire. Much better than my usual instant mashed potatoes.

The next day I got up early, and after having breakfast, I packed up and set out. Everything was wet, and I had to pay great attention to maintaining certain items dry such as my jacket and sleeping bag.

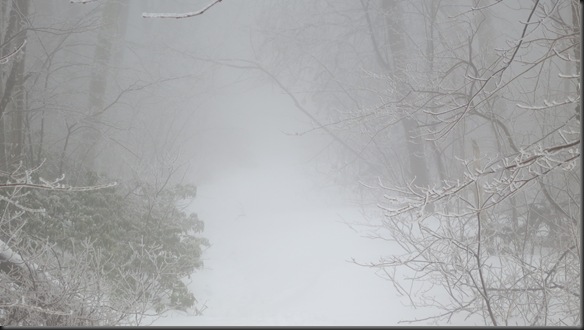
After climbing only a short distance in elevation, I entered the layer of thick fog that was covering the mountain.

243

I expected this part of the trip to be much worse than it was. I was able to follow my footsteps out pretty well, and while there was more snow/ice coming down, there the tracks were still very clear. After a few more hundred feet in elevation, the temperature dropped noticeably down to about 23F (-5C). With the lower temperature, there was no more melting snow and ice. There was just snow. I could finally remove my shell jacket.

247

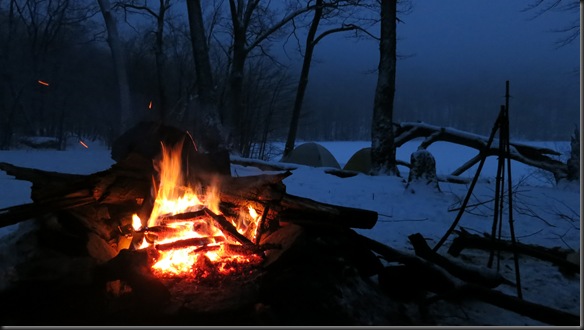
Not long after that the fog cleared and all that was left was a beautiful, frozen winter landscape.

256

After another hour or so I was back up to the highest point in the trip. From there it was a quick descent down. I only stopped to eat and drink water. A few more hours, and I was back at the car.

1

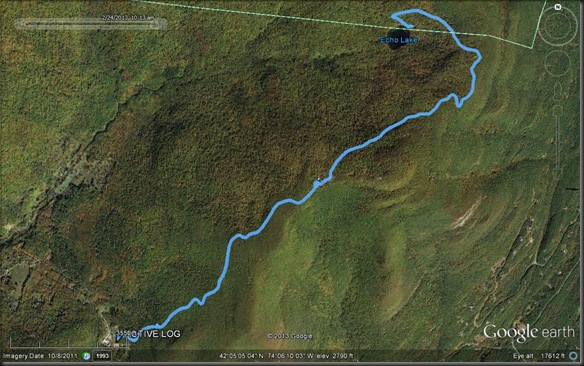
It was an eight mile round trip with about 1200 ft elevation gain. The route required me to go up to a high elevation, and then descent towards the lake. I would then have to climb back out and then down the mountain, creating this amusing elevation diagram.

2

A nice, fun, easy trip overall. I met some nice guys and had a good time. The weather is my least favorite. I would have much preferred it to have been a little colder, and I also wish I had brought my snowshoes, but those are minor nuisances in an otherwise fun trip.

My Three Season Camping and Bushcraft Clothing

$
0
0

Now that you have seen my three season gear, I figured I would go over my three season clothing with you guys. There is nothing special or unusual about it. It divides into the typical base layer, insulation, and shell components. I’ve been going over different clothing options for a while, and this is what works for me. Just like with my three season gear, my three season clothing is intended to go down to temperatures of 32F (0C). Of course I do not always carry all of the items you will see here. In warmer weather a lot of the insulation gets left at home. However, a combination of all of these elements allows me to use this clothing down the the above mentioned temperatures.

Base Layer

As a base layer, I use very simple components. I use underwear that is 100% synthetic. It’s nothing special, it just wicks moisture well, and most importantly dries fast. It is from the C9 line by Champion. On top, I use a synthetic t-shirt from the same manufacturer. Again, nothing special, it just dries very fast, which is what I find important. You can see the t-shirt in the picture below. I have spared you the underwear shot.

0883 

Mid Layer/Insulation

The mid layer provides both insulation and protection. For the legs I use a pair of Mountain Hardware synthetic soft shell pants. They are a nylon spandex mix, which gives them great stretch and flexibility. They also dry very fast and have proven to be very durable. They don’t make this particular model any more, but I simply aimed for the thickest, most durable looking one I could find. That’s it as far as a mid layer for the legs. It’s function is more one of durability and protection than insulation.

2253

For the top half of my body, I have two separate components that serve to provide insulation. The first is a Carhartt mid weight fleece top. It is about the equivalent thickness of 100 weight Polartech fleece. I have had it for many, many years. It is well worn, but still serves me well. I am sure there are more high tech tops out there, but this one is an old friend. It has a half zipper, which helps a lot with ventilation when needed.

1163

On top of that, I currently use a REI Revelcloud jacket. It is a synthetic jacket with 60g of Primaloft One fill. It is virtually identical to the Patagonia Nano Puff, except much cheaper. It compresses into a very small package, while providing good insulation. The Primaloft One insulation deals fairly well with moisture, and the jacket is thin enough to layer well with other clothing. It weighs 12.5 oz, and a lot of the time it stays in my pack. During three season backpacking, I mostly use it when I am sitting around in the evenings. I used to use a 200 weight Polartech fleece for this layer, which worked well, except that it was much harder to pack. The REI Revelcloud compresses to about a third of the size of the fleece jacket, which frees up a lot of room in the pack. I resisted the change for quite some time, but eventually the smaller size won out.

3633

Shell Layer

For me the main purpose of the shell layer is rain protection. All of my clothing is fairly wind resistant, so I don’t tend to use it as a wind shirt, although sometimes I would put my shell jacket on for extra insulation.

The primary component of my shell system is the Arcteryx Beta SV jacket. It is made of Gore Tex, and is one of the lightest durable jackets that I have found.

4713

The jacket weighs only 11 oz, and spends most of its time in the pack. I always carry it with, even if I am not expecting rain. Unlike some ultralight jackets that are designed just as emergency rain gear, the Arcterix Beta SV is a tough and robust jacket that that is a good all around component of a layering system. It also packs very small, so it is easy to always have it with me.

Ordinarily, if I am not expecting rain, I will not bring a shell layer for my legs. However, if I know that I am going out into the rain, I will bring a pair of shell pants. My current ones are the Marmot Precip full zip pants. They use Marmot’s own proprietary breathable waterproof membrane. I got them for two reasons. The first is that they are relatively cheap. I use them in winter as well, and shell pants tend to get torn up when using crampons. I didn’t want anything too expensive. The second reason is that they have full side zips, so they open completely. That way I can put them on without having to remove my shoes. The pants weigh 12 oz, but unfortunately, because of the full zippers, they don’t pack as small as I would like.

5243

Boots

Before I mention the boots, a word about socks. I use a wool/synthetic blend socks. You can get them from any outdoor store. I know people obsess about socks being pure wool, but there is a reason pure wool socks are almost impossible to find-they suffer from some problems. Wool tends to stretch and become loose. That is countered by adding synthetic materials that will allow the socks to maintain their shape. Wool/synthetic blend socks work great. I carry an extra pair in my pack that I keep dry.

As far as the boots, I use the Solomon Quest 4D. They are a Gore Tex lined full leather boot. They have fairly flexible, but thick soles. I like a full boot instead of ankle length ones or trail shoes because I find they protect my feet better. I don’t worry about ankle support, but I find that when going down hills, the fact that the boots can grab your ankle securely prevents your toes from getting jammed into the boot. I’ve had these boots for a long time and I love them.

Gloves

I will usually have a pair of gloves with me, especially in spring and fall. Currently I just use a pair of liner gloves from my Outdoor Research (OR) Arete gloves. They are nothing special, just something to make sure the skin is not directly exposed to the elements. They can also be dried out fairly easily using body heat.

Hat

My hat is an old merino wool watch cap. I am very picky about the way hats feel, and this is one of the few that I like wearing. It is getting a bit stretched out, and it does take very long time to dry, but it is still the one I carry.

Neck Gaiter

The last component of my system is a Smart Wool neck gaiter. It does a great job at preventing heat from escaping around the neck, and can also be pulled up to cover the face.

And that is all of my three season clothing. I don’t carry extra items. What you see is literally the entirety of my clothing. I try to stay away from gimmicks and claims about magical material properties. I focus on well designed clothing that when used properly can give you the best protection over the largest range of conditions.

My Winter Backpacking and Bushcraft Clothing

$
0
0

You recently saw my three season clothing. It is the main component of my winter clothing system as well, so if you have not read it, please have a look here.

Before I get into details about the actual clothing, I want to go over some issues that I see with the more traditional approach to winter clothing. In large part, my separation from that approach and what I see as a very limited and somewhat outdated method to winter clothing selection is what has lead to the system that I currently use. For more background on the theory, you can see my post here.

I have read it many times, and it is said fairly often that winter is a time of limited mobility because exerting yourself will cause you to sweat, which admittedly is a large problem when the temperatures are low. This seems to be the predominant view on winter clothing and activity in the bushcraft community. As a result most trips involve pulling a sled or carrying a massive pack over a very short distance, then setting up camp. As I mentioned, I think that is the result of an outdated approach to winter clothing.

There are two dominant approaches within the current methodology, at least in the bushcraft community, that seem to control and inform winter clothing selection. The first is to wear the usual layers (base, insulation and shell) with a large, heavy outer coat like the army surplus parkas. The second is to have the same base layer, then a large amount of insulation, possibly in numerous layers, covered by an oversized shell jacket like an anorak. Both approaches focus on wearing enough clothing to be warm in winter when you are sitting in camp. The unavoidable result is that once a person tries moving, he immediately overheats. At that point, with the first approach, the large heavy jacket is impossible to remove because its size prevent it from being stored in a pack, while with the second approach, having to remove layers from under the anorak and then put them back on when the movement stops is horribly inefficient and leads to much heat loss. As a result of that inefficiency, movement in winter ends up being very limited.

In an attempt to cope with these issues, people tend to mistakenly focus on two components as a panacea for the problems with the system. The first is breathability, and the second is the type of material of which the clothing is made.

It is often thought that if a material is breathable, then you will not overheat. That couldn’t be further from the truth. If your clothing traps too much heat, then you will overheat, you will sweat, and you will get wet. A breathable material does not magically dry you out. Put on a fleece or wool jacket in summer and see how dry you stay. For that matter, put on a simple breathable t-shirt and see how dry you stay after you do some jogging. A breathable material will allow for the movement of normal moisture regularly produced by the body, but if you are overheated, it will do very little for you. To add to the problem, in cold temperatures, breathability becomes less of a factor because the moisture from your body tends to freeze within the material before it has a chance of leaving the clothing. As a result, even breathable clothing will become saturated with moisture and ice.

Similarly, many think that a specific magical material will offer a solution to the problems. Every outdoor community has it’s own magical material, whether it be wool, fleece, Primaloft, Gore Tex, Ventile, etc. Each claims to keep you warm yet cool; be fully breathable yet fully waterproof. Ultimately none of them offer a solution. If improperly used within the system, or if the clothing system is improperly designed to begin with, then no material will fix the problems.

Instead, my solution has been to focus on selecting clothing with specific dedicated purposes and making sure it is properly designed for the task. The functionality comes from properly applying those components, not from the materials themselves. I prioritize the design of the clothing and its ability to be used efficiently.

My approach to winter clothing is centered on mobility rather than insulation for camp use. My system has two components. The first is the action suit. You can see all of its components in my three season gear. Depending on the temperature it may utilize both pieces of upper body insulation and the shell layer, but its ultimate goal is to provide just sufficient insulation and protection for when I am active. Often times that is very little. This light insulation or action suit allows me to move rapidly and exert myself without overheating.

006 - Copy[3]

The second component of my system is designed to deal with the times when I am in fact stationary. Once movement stops, the heat produced by the body drops significantly. When stationary, much, much more insulation is needed to keep you warm than when moving. Because my system is centered around mobility, this insulation layer for stationary activity has to be stored for most of the time. This means it has to be light and compressible so that it fits in my pack. It also has to be designed so that it can be put on quickly when I stop so I don’t lose the heat my body has already generated, and it has to pack away quickly and easily when I am ready to keep moving.

So, now that theory has been covered, on to the details. Remember that I am starting with the components of my three season clothing as my insulation when mobile; it is my action suit. It is enough to keep me from freezing when moving. When I stop however, I add the secondary, heavy insulation which has so far been stored in my pack.

First, for my lower body I don’t use that much additional insulation. I find that if my core is protected and warm, my legs deal with the cold just fine. The only addition is a pair of mid weight Capeline thermal long johns that go under my pants. Also, in winter, since there is usually snow, I wear my shell pants, which provide some extra warmth. Some people like to carry a pair of zip on insulated over pants, and I thought about getting some, but I have not needed them so far.

The main insulation component of the winter system is a large jacket that gets put on over all of my other clothing. It is often called a belay jacket by climbers. It is just a very warm, lightweight, easily compressible jacket. Depending on the temperature, I use one of two jackets.

For temperatures between 32F (0C) and 0F (-18C) I use the Patagonia Dead Air Space (DAS) Parka.

1733

It is a synthetic, Primaloft One fill jacket with 170 grams of insulation. It has a thin water repellant shell, and weighs 1 lb 13 oz for the medium size. At least, this was the 2012 model that I have. For 2013 it has gone through some redesigns including a change of insulation to 60 grams of Primaloft One and 120 grams of Primaloft Synergy. I’m not sure what the overall effect will be.

For temperatures below 0F (-18C) down to as far as I have courage to go – about –30F (-35C), I use the heavier, Eddie Bauer First Ascent Peak XV jacket.

238[3]

The Peak XV is a down jacket. It uses 850 fill premium goose down, and has a very tough (I think unnecessarily so) cordura shell. The jacket weighs 2 lb 6 oz. I use the large one so that I can easily layer it over whatever I am wearing. The Peak XV is clearly heavier than the Patagonia DAS Parka, and it is not nearly as compressible. It fact, it compresses to the size of my three season synthetic sleeping bag. However, it is extremely warm and well designed.

Aside from the jackets, there are a few other items to talk about. One is the gloves. Other than the liner gloves mentioned in my three season clothing list, I carry the actual OR Arete gloves. Together with the liners, I find them warm enough for virtually any activity that requires my hands to be out of my pockets. The gloves have a Gore Tex shell, which keeps them dry – something I find very important.

The next item is gaiters. I have started using them all the time in winter as they keep the snow out of my boots and keep the bottoms of my pants dry. I use a pair of knee high (just under the knee) REI Havenpass eVent gaiters. I know that the OR Crocodile gaiters are very popular, but I didn’t like them because I find the attachment they use to connect them to the boot laces is pretty much useless. It is much better on the REI gaiters. The pair weighs 7.2 oz.

As far as boots, I use several different ones. For more detailed information, have a look here. For warmer winter weather, down to 0F (-18C) I use the same Solomon Quest 4D boots that I mentioned in my three season clothing. I just put on a thicker pair of socks. It the temperature gets colder than that, I use the Merrell Norsehund Alpha boots. They are a double boot that has a very good amount of insulation and a relatively stiff sole. If I will be doing any more technical travel that requires full crampons, I switch to the Scarpa Mont Blanc boots. They are a completely rigid mountaineering boot that can take automatic crampons. Because of its single boot design, I find it relatively comfortable to use over long distance travel. I typically use vapor barrier liners (VBL) with my boots in winter, which prevents the moisture from my feet from getting my boots and socks wet. I wear liner socks under the VBL.

And that’s it. It’s pretty straight forward. I use just the same clothing all year round with the few additions you see above. I’m sure others will disagree very strongly, but this is the system I have been using, and it is what has worked for me. I find it gives me great flexibility, and most importantly, allows me to be active during winter.

The Incomplete Woodsman - Skills We Lose Because of Our Close Mindedness

$
0
0

Before I begin this latest rant, I want to be clear that here I am going to focus on those of us who select skill sets and equipment that we think will make us better woodsmen. I will not be talking about historical researchers and recreationists. That is an academic and worthwhile pursuit based in research, nor would I be speaking about gear and skill selection that is honestly based on reasons other than practicality or direct furtherance of woodsmanship. This is also not meant to be a direct response to anyone else’s post either. As luck would have it, a few fellow bloggers have recently posted on similar subjects. I started writing this one a week or so ago, so its intent was not to address any of their posts directly.

Long time ago, when I first started going into the woods here in the US, I noticed, just as have many others that a large portion of backpackers lack some basic wilderness skills. It was shocking to me that people would go into the woods but know almost nothing about making fire, selecting a shelter site, tree identification, etc. So, I quickly steered towards what has come to be known as the bushcraft community, a group of people who were more interested in preserving the skills used by outdoorsman throughout history.

As time passed however, I started noticing a peculiar trend with some members of that community. The problem as I see it is one of selective historical memory of outdoor/woodsman skills. It is as if though people pick a particular time period in history and proceed to learn all of the skills utilized through the time. That is all well and good, but for some reason they would then refuse to learn any skills that were developed by woodsmen after their chosen historical period, or use any technology that post dates it, with the exception of technology that mimicked the look of the old ways (ferro rods, parachord, etc).

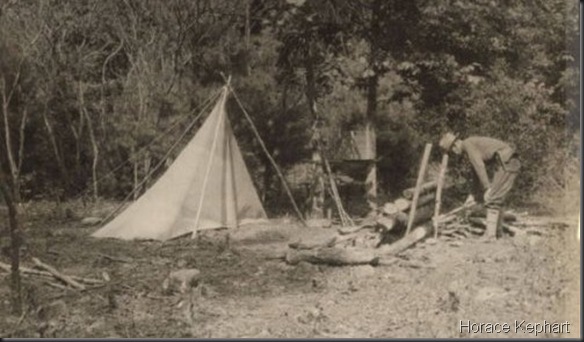
It is as if though for some people history is divided into two periods: the time when there was valuable knowledge of wilderness skills, and the time where there was none. Different people would draw the line at different places, but for most it seems to be the late 19th/early 20th century, focused around Nessmuk and Kephart. As a result, people would work very hard to preserve the skills known and used during that time period (an admirable pursuit), but then strangely they would refuse to accept or even acknowledge the possibility that there was any further development in woodsmanship after that period, and no knowledge or development that occurred after that period is worth learning or using.

Kephart_Camp-44b34

I am very perplexed by what I see as this artificial dichotomy. As far as I can tell, development of woodsmanship, wilderness skills, and bushcraft occur on a continuum. Each generation of woodsmen (recreational or professional) that goes into the woods learns from those before them and then elaborates on those skills and improves on them based on what is learnt over the years. We seem to forget that while Nessmuk and Kephart were passing down traditional knowledge, at the same time they were innovators both when it came to skills and equipment, and they quite often departed from the “old timers” in their recommendations.

In my opinion it is foolish and disrespectful to many woodsman to assume that everything worth knowing about being in the woods ended in 1920. Not only is it strange from a theoretical standpoint, but in my opinion it leads to poor woodsmanship and is as regrettable as the lack of knowledge of those backpackers who can not start a fire or use a compass. Each group has neglected valuable knowledge about living in the woods; but just done it by ignoring the knowledge of different time periods.

It is certainly understandable how one can reach the conclusion that after a certain point in history knowledge of woodsmanship was lost. If we look at current backpackers very superficially, we may be justified in saying that they know very little about life in the woods, and that as a result we should look at woodsmen from the past for guidance. If we however look more closely, we will see that this couldn’t be further from the truth. It is true that many backpackers lack basic knowledge of the woods, but that has always been true of the recreational outdoorsman. In fact, both Nessmuk and Kephart write about those people during their time, and the same is true if we look even further back. Wilderness guides and experts were always in need to lead other less knowledgeable people through the wilderness, and dime store novels about their exploits were always fast sellers.

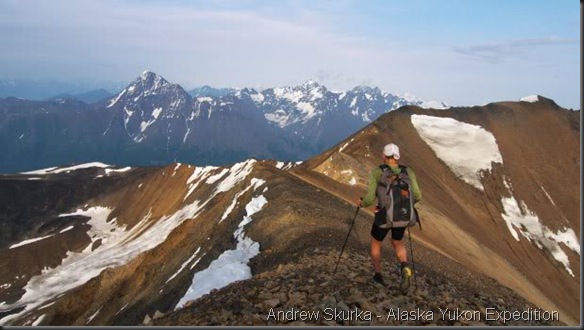
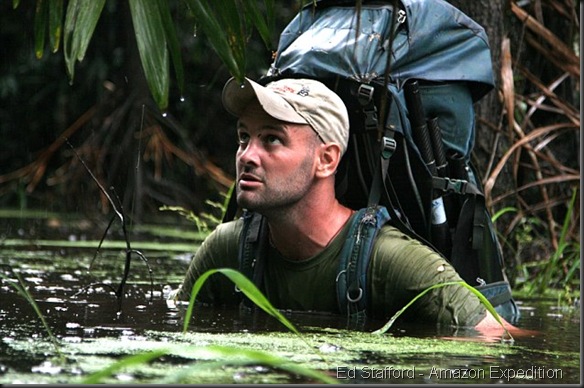
The same is true today. Yes, the average person who car camps on weekends may lack knowledge of the woods, but there are many others, and have been continuously through our history, who perform great exploits in the wilderness. In 2010 Andrew Skurka completed a six month, 4679 mile circumnavigation of Alaska on foot and with pack raft, navigating with a map and compass. In 1986 Reinhold Messner became the first person to climb all 14 26,247 ft (8,000 m) peaks without supplemental oxygen. In 1992 Sir Ranulph Fiennes and Dr. Mike Stroud became the first people to cross Antarctica unsupported. In 1995 Richard Weber and Mikhail Malakhov became the first to reach the north pole and return under human power unsupported. In 2010 Ed Stafford became the first person to travel the length of the Amazon. The journey took him two years. And these are only few of the many examples out there.

5283a725

Are we to look at all of those woodsmen and skilled outdoorsmen and tell them that their knowledge and skills are not worth learning? That the height of woodsmanship was achieved in the 1920s, so the developments they contributed and the skills they pioneered should be ignored and marginalized? Is the gear they used and developed for their journeys somehow less “outdoorsy” than that developed by someone in the 1900s?

article-0-07747E85000005DC-63_634x420

Some proponents of woodcraft or bushcraft appear to see everything as a struggle between woodsmanship and modern backpacking. For them somehow they are mutually exclusive, and the later is to be looked down upon. Perhaps this mentality is understandable. It is in large part reactionary to the regulations of the 1970s where in order to curb the tide of irresponsible outdoorsmen, there was a large push to use modern equipment rather than natural resources. Now the pendulum seems to have swung in the opposite direction, degrading anything that was a product of the second part of the 20th century and forward. While understandable, I believe that mentality to be overly simplistic and driven by emotion rather than practicality. Unfortunately the result is loss of valuable wilderness skills and abilities.

Woodcraft, woodsmanship, bushcraft, or whatever else we want to call it progresses through time. A smart woodsman learns from the experience and knowledge of those who preceded him, and then continues to innovate and develop. He takes technology that works and adopts it so that his ability to travel through the woods can be furthered and achieving his goals can be made possible. Ignoring the past, whether it be the distant past or the more recent past is a foolhardy approach that I find disrespectful to all those woodmen that have risked their lives, and in many cases have lost them in furtherance of those skills, knowledge, technology and equipment.

The luxury of rejecting more modern and practical gear and techniques is only something we possess because we do not actually rely on any of the woodcraft that we so loudly preach. It is only when your trip is restricted to the backyard that we can talk in grandiose terms about the spiritual value of woodcraft and the evils of modern technology. We then take this emotional drive, combine it with a dose of nostalgia, and we force upon the outdoor community this artificial dichotomy of woodcraft vs. modern camping; a dichotomy that is neither true nor necessary. No actual woodsman throughout history has had the luxury to do so because their lives have been too focused on practical pursuits.

Of course any of us who are more familiar with the woods can go out there in moderate temperature, spend half the day collecting firewood and then sit by the fire wrapped in a wool blanket. Does that make for a better woodsman? In my opinion it does not. In one stroke of the brush, this person has now limited his abilities as a woodsman. Instead of being able to travel further, climb higher, hunt more game, gather more resources, and explore a greater part of the forest, he has locked himself down because of poor gear selection in a way that completely ignores the spirit of those woodsmen from centuries past who went into the woods with practical pursuits in mind, to explore, to hunt, to pioneer. Furthermore, this person is now limited in the type of weather in which he can go out. A blanket and fire is fine in mild temperatures, but when the mercury drops, the result is that this person ends up staying home because as our predecessors such as Kephart and E.H. Kreps noted, wool blankets are inadequate for winter travel. A better woodsman? Why is the ideal being able to go into the woods with a blanket roll, a tomahawk and a knife? How does limiting what we can do, where we can go, what we can hunt, how far we can travel, and even the time of year in which we can go out make us better woodsmen? In my opinion it does not, and the approach would make people like Nessmuk, Kephart, and the woodsmen that preceded them look at us like we have lost our minds. Any goal we wish to pursue, whether it be minimalist gear, weigh reduction, long distance travel, hunting, fishing, etc, can be furthered by and accomplished within a more inclusive view of skills and gear that is not limited by any specific time period or trend.

Because of what I perceive as our close mindedness, we continue to lose valuable woodsmanship skills. A backpacker who ignores the techniques used by woodsmen in the first half of the 20th century is just as responsible for the destruction of woodcraft knowledge as the “woodsman” who ignores the techniques used by woodsmen in the second half of the 20th century. Once we abandon these arbitrary notions about what knowledge is useful and what knowledge is not, we can move forward towards more well rounded knowledge of woodsmenship, and beyond this philosophical “us vs. them” and “traditional vs. modern” nonsense. Certainly, one is free to enjoy the outdoors as they see fit, and going out with period equipment offers many educational and personal challenge opportunities. Many have gone into the woods with period equipment for educational reasons. People have climbed Everest in early 20th century gear, and have crossed Greenland with 19th century gear. All worthwhile pursuits. Or perhaps, if any of us feels like they are such accomplished woodsmen that living in the woods with modern backpacking gear is too easy, they may want to try it with retro gear for the added personal challenge. However if our goal is to be a well rounded and proficient woodsman, then I believe a more open minded approach is required. I believe that we need to look at the totality of skills and equipment available to us, without judgment or sentimentality and decide what works best and what will allow us to be most proficient in the environment we will encounter. I believe this approach much more closely resembles that taken by the woodsmen that preceded us.


My Winter Backpacking and Bushcraft Gear

$
0
0

Over the past two weeks I have been trying to give you a list of my backpacking and bushcraft gear. I have done the posts in the order that I have because each subsequent post builds on the prior ones. In order to understand my winter gear, you will need to look at both my clothing and my three season gear.

My Three Season Backpacking and Bushcraft Gear

My Three Season Backpacking and Bushcraft Clothing

My Winter Backpacking and Bushcraft Clothing

As with my clothing system, my winter gear is in large part composed of my three season gear with some alterations and addition. If you remember, the base weight of my three season gear is 14 lb (6.4 kg). However, before I get into the details, let me give you a bit of background on my gear selection process and philosophy regarding winter backpacking.

When I wrote about my winter clothing, I mentioned that for many people winter seems to be a time of restricted movement and limited travel. One of the reason I gave for why I believe that to be the case is the clothing systems currently employed. Another obvious reason however is gear selection. People seem to resign themselves to the fact that being out in the woods in winter requires more gear, and just let themselves go. Winter backpacking or bushcraft seems to be a code word for turning a man into a pack animal. I don’t believe that to be necessary, and a lot of what I have tried to do with my winter gear has been focused on avoiding this problem.

For me reduction in weight is not simply important for the obvious reasons, i.e. you can move more easily and travel deeper into the woods, but there is also a secondary, related reason. When the weight of a set of gear increases beyond a certain point, people naturally look for ways to get around it. One of the ways is to use devices that can supplement mobility. The most obvious one is a sled or pulk that you can pull behind you. This allows you to increase the amount of gear you can comfortably transport. My focus on reduction in weight has allowed me to avoid such devices, because while useful, I find them very restrictive to mobility in the woods. While a sled makes the load easier to move, it significantly restricts where one can go. In a more mountainous terrain, mobility with a sled becomes very limited despite the ease of movement.

For similar reasons, I have stayed away from skis. While they are a great tool in certain types of terrain, and a very skilled skier can use them effectively in many ways, ultimately, they limit where one can go. Having to backpack with skis strapped to a pack is something I never want to repeat.

So, to summarize my approach, just as with my clothing, my gear is centered on mobility. I want to be able to go wherever I want in the woods, whenever I want, and for as long as a chose. My gear is centered around allowing me to do that. Now, on to specifics:

Temperature from 32F (0C) to 0F (-18C)

As with my winter clothing, my winter gear is divided into two groups. The first set of gear is designed for temperatures from 32F (0C) to 0F (-18C).

017

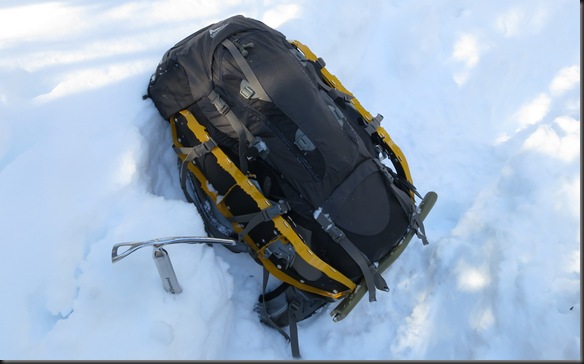
The gear that I use for this temperature range is nearly identical to that used for my three season backpacking with one change, and one permanent addition. To that I add some other items depending on the terrain I am likely to encounter. All of the gear is carried in the same pack, the REI Flash 62 that I use for my three seasons backpacking.

To begin with, please take a look at my three season gear here if you have not already done so. The one change that I make is to replace my MSS warm weather Patrol 32F (0C) sleeping bag with the Western Mountaineering Antelope MF sleeping bag. It is rated to 0F (-18C) and weighs 2 lb 7 oz. It is filled with premium 850 goose down and has a micro fiber shell. The shell is water resistant and light, but not as tough as those made out of Gore Tex. As you can see, the Western Mountaineering Antelope MF weighs only 1.7 oz more than my synthetic warm weather bag, and it interestingly compresses down to the same size. That is the reason why I can still use my three season pack for most of my winter backpacking.

The one permanent addition I make to my three season gear to convert it to winter backpacking in addition to the substitution of the sleeping bag is to add the Patagonia DAS Parka. I store it in the front floating pocket where it gives me easy access. If you have not read my post on winter clothing, you can do so here. It would make a lot more sense. The DAS Parka weighs 1 lb 13 oz.

I also usually bring a piece of closed cell foam pad to sit on. It weighs  2 oz.

And that’s pretty much it when it comes to converting my three season gear to winter use for temperatures down to 0F (-18C). I replace the sleeping bag with a warmer one, and I add a jacket. Everything else stays the same. The total base weight of my gear with this set up increases to 16 lb 0.7 oz (7.2 kg). That is the set up I carried on my last trip to Echo Lake. You can read about it here. It will be sufficient for most winter outings in temperatures down to 0F (-18C).

1103 

Now, under certain conditions, I may need to add some extra items to facilitate mobility. I may bring one, all, or none of these items depending on the terrain I am about to encounter.

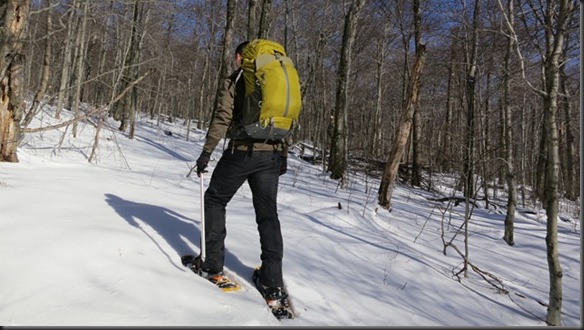
The first item is my snowshoes. As I mentioned earlier, I do not like skis because I find they limit where I can go. I have had much greater luck with snowshoes, and my love for them has increased exponentially since I got a good pair. The snowshoes I use are the 25 inch MSR Lightning Ascent. MSR’s Ascent series are designed for backwoods travel. They have multiple straps in case some of them get damaged, and they have fairly aggressive crampons built into the frame which allow for travel over steep terrain. They also lock the shoe in very well so there is no lateral movement. Compared to regular strap bindings, this greatly reduces snowshoe overlap. The pair of snowshoes weighs 3 lb 15 oz. They are heavy, but worth their weight in gold when you hit deep snow.

190

The next item is my crampons. I have two different sets that I use depending on the conditions. I don’t always need or carry crampons, but when heading to elevation, or expecting icy terrain, they are a must. A few years back I dislocated my shoulder in the woods because I didn’t have my crampons. I try not to make the same mistake again.

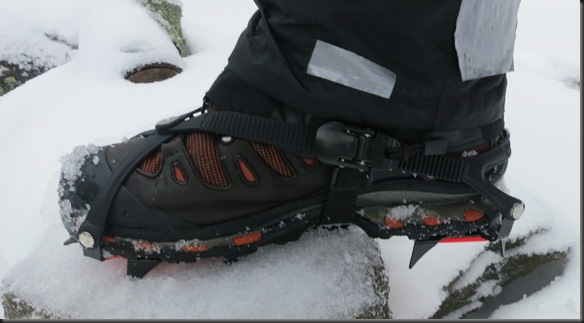
If I am expecting just light crampon use, I bring the Hillsound Trail Crampon Pro. These are what I would call approach crampons. They have relatively mild spikes, flexible frames, and universal attachments that can fit them onto just about any regular backpacking boot. They will not work well with very soft boots like PAK boots. The pair weighs 1 lb 7.9 oz. There are lighter options like microspikes, but I like the more aggressive crampons, and the anti-balling plates, which prevent snow accumulation on the bottom of the crampons.

231 

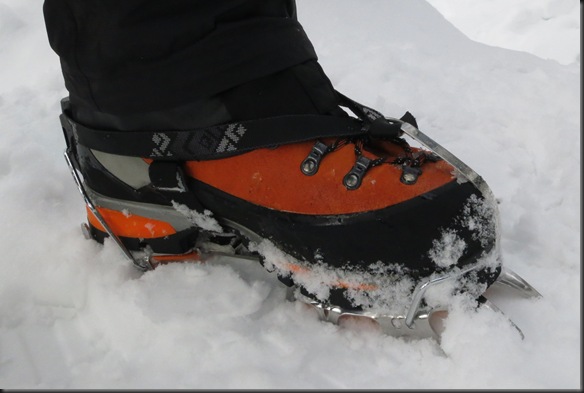
When serious crampon work is needed, I pull out my rigid boots, and my full crampons. I use the Black Diamond Sabertooth Pro crampons. They are fully automatic and require that the boots be designed to work with such crampons. They are a general mountaineering crampon with horizontal front spikes, instead of vertical ones for ice climbing, although they perform very well in that role as well. I have been very happy with them. The pair weigh 2 lb 1 oz. Either set of crampons requires a crampon bag (at least I require it), which I made myself. It weight 6 oz.

034

And of course, when I use crampons I need my ice axe. I currently use a 60 cm Black Diamond Raven Pro as my general mountaineering axe. I have been making some modifications to it this winter, but I’ll leave that for another post. The ice axe weight 15 oz.

044

Now, this is definitely everything. The only other items are clothing that may come in and out of the pack depending on conditions. You can see my posts on clothing for the details. In the weight calculations here, I am including the weight of the DAS Parka in the pack weight because it stays there for most of the time and certainly when I am moving. Assuming that I am carrying all of the additional gear; snowshoes, the heavier Black Diamond set of crampons, and the ice axe, the total weight of my pack for the winter gear for temperatures above 0F (-18C) is 23 lb 5.7 oz (10.5 kg). This is the gear I carried on one of my January trips this year. You can read about it here.

1863

Temperature below 0F (-18C)

When the temperatures drop below 0F (-18C), then some larger changes are required.

030

Specifically, three changes occur. The first is that I once again switch to a warmer sleeping bag. I replace the Western Mountaineering Antelope MF 0F bag with the Western Mountaineering Puma MF. Just like the Antelope, the Puma has 850 premium goose down fill and a microfiber shell, however it is rated to –25F (-32C). It weighs 3 lb 7 oz and is quite a bit larger when compressed than the Antelope. I am sometimes asked why I don’t just get an extremely warm sleeping bag, something rated to –40F (-40C). The answer is that the warmer the bag is the exponentially larger it has to be. That small increase in insulation leads to a large increase in weight and volume. Using your shelter, sleeping bag and clothing together can get you into those temperatures without the added weight and volume (unless you are on Antarctica).

The second change is that I replace the Patagonia DAS Parka with the Eddie Bauer First Ascent Peak XV jacket. The jacket is much warmer, and correspondingly heavier and bulkier. It weighs 2 lb 6 oz. For more information see my post on winter clothing.

Because of these two changes, my gear now becomes too bulky to fit into my REI Flash 62 pack that you saw earlier. With the larger bulk I need to switch to a larger pack, the Gregory Palisade 80L. It is a significantly heavier pack at 6 lb 3 oz for the medium size and has a 80L volume. The added weight translates directly into comfort as it does with most Gregory packs. Even with the heavier loads, I have always been comfortable wearing it.

The only other change I may make depending on exactly how cold the weather is, is to replace the Kovea Spider stove with the MSR Whisperlite International. Together with a repair kit and a 22 oz bottle, the MSR Whisperlite weight 1 lb 7 oz. It is quite a bit heavier, but worth the weight when you have to melt a lot of snow.

305[3]

So, for this second set of gear designed for very cold weather, the total weight, assuming again, snowshoes, crampons, ice axe, jacket and the MSR Whisperlite stove replacement, is 28 lb 13.4 oz (13 kg). Now, that is quite a bit of weight. To that you have to add fuel, food and water. Even so, with two litters of water and three days of food, the weight should still be about 37 lb. It is heavy, but still quite portable over long distances and varied terrain. This is the gear I carried on my summit attempt of Mt. Washington. You can read more about it here.

005

Of course, this last weight represent the extreme weight of my gear, with me bringing tools for every terrain I might encounter at very low temperatures. For the average person doing winter backpacking, most of that gear will not be needed. If you just look at my winter gear without crampons, snowshoes, etc, for temperatures above 0F (-18C), then the base weight would be 16 lb, 0.7 oz (7.2 kg).

I hope this has been of some use. The above represents what i would call my bushcraft and backpacking gear, which allows me to move through and stay in the woods. If I am out for more specific pursuits like fishing, hunting, or ice climbing, more items will be needed.

Edit: I forgot to mention in the post that for winter backpacking, I remove the Sawyer Squeeze filer from my gear. Filters freeze in winter and can get damaged easily. During winter I melt and boil my water from snow, or use purification tablets if I am in an area devoid of snow. Therefore, you can remove 5.0 oz from all of the weights I listed above. I also replace my collapsible Platypus bottle with a collapsible Nalgene bottle. It is the same type of folding bottle except that it has a wide mouth opening like regular Nalgene bottles. The wide mouth prevents it from freezing over as quickly as a regular Playpus bottle.

I also add a second Nalgene folding bottle as a pee bottle. Getting out of a sleeping bag at night in cold weather is not a good idea. You lose huge amounts of heat and have to spend a lot of energy afterwards to reheat the sleeping bag. So I guess, you can add the 5.0 oz back to the above weights. :)

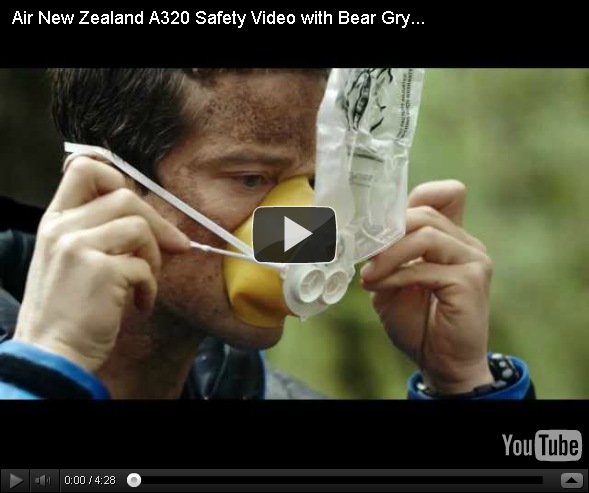
Bear Grylls Safety Instructions

$
0
0

I was emailed about a video with the above title. Knowing Bear’s approach to the wilderness, I wasn’t sure what to expect, but the video was actually quite funny, and intended to be so as well. It was made by Air New Zealand for their airline safety instructions.

It more or less pokes fun of the way Bear approaches situations in the wilderness, and applies his tactics to airline safety. It is worth a look.

The First Successful Summit of Mt. Everest by an American – A look 50 Years Into the Past

$
0
0

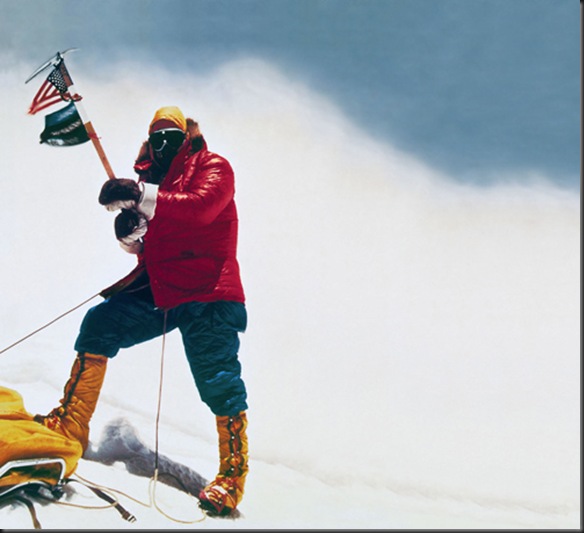
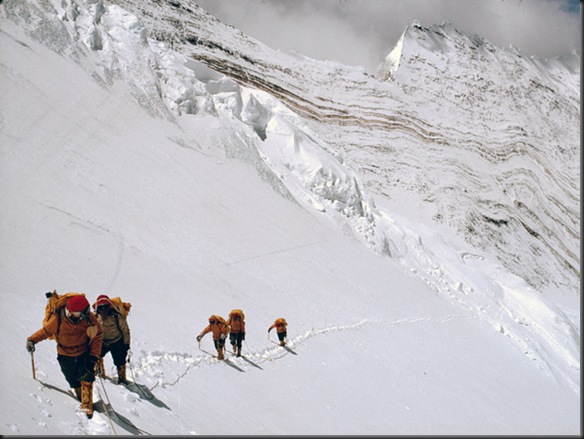
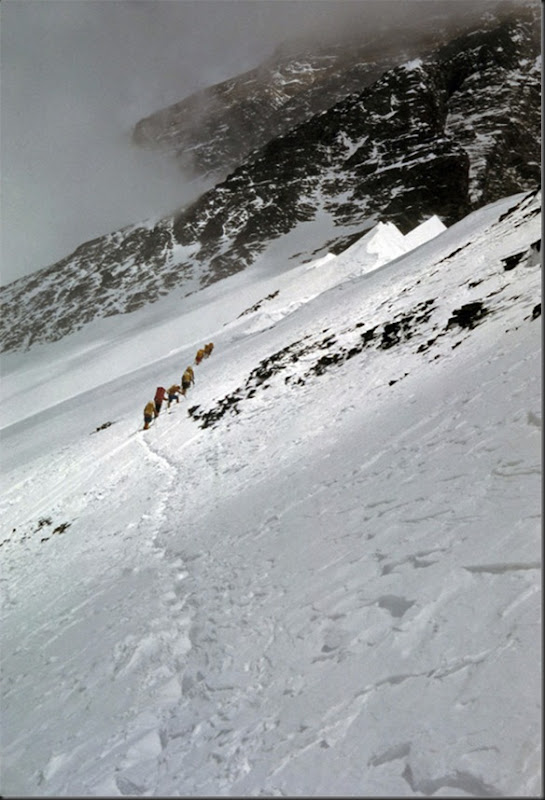
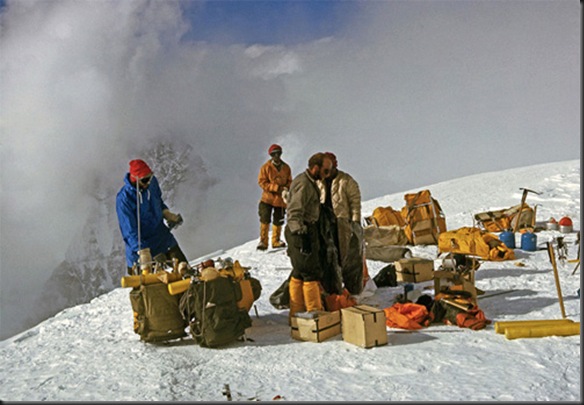
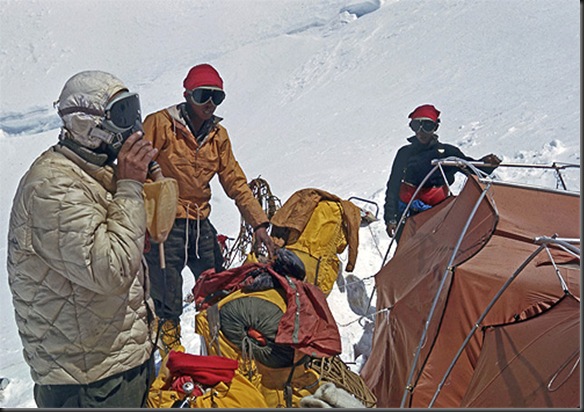
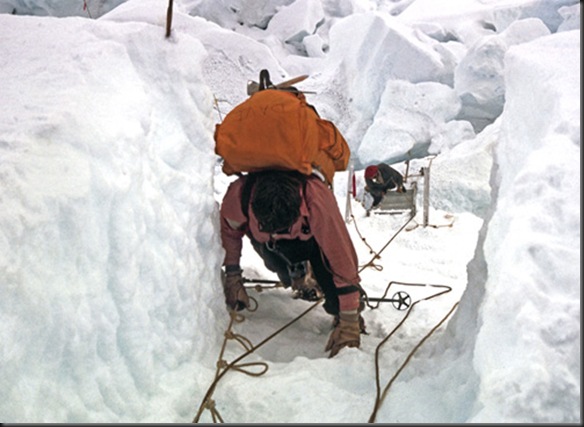
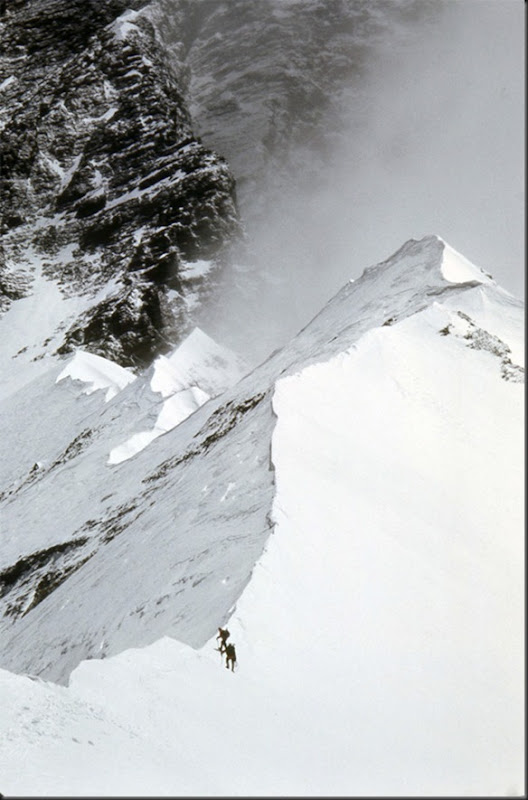
This year marks the 50th anniversary of the first successful climb of Mt. Everest by an American. It also marks the 50th anniversary of the first summit of Mt. Everest by the Western Ridge.

7932

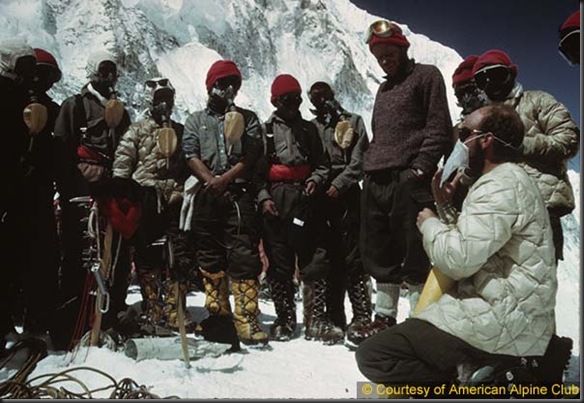
We are all familiar with the first ever successful summit of Mt. Everest by Sir Edmund Hillary and Tenzing Norgay in the 1953 British expedition. Understandably, much less is known about the first successful American expedition to the summit of Mt. Everest. Jim Whittaker became the first American to summit Mt. Everest along with the Sherpa Nawang Gombu (nephew of Tenzing Norgay). In the same expedition, Dr. Tom Hornbein and Willi Unsoeld completed the first successful summit of Mt. Everest using the Western Ridge. I wanted to make this post so I can share some photos of the expedition. A good account of expedition can be found on the National Geographic site here.

Picture 015

10558

Sherpas-departing-4W-1963

10545

10556

10557

10559

10552

Mount_Everest_Horbien-Teaches-Oxygen-Mask-1963

Many have argued that this summit attempt was perhaps the last expedition style climb to be made, involving large teams of climbers, Sherpas, and gear to be progressively carried to higher camps. The expedition approach has made a comeback in recent years since Mt. Everest has become a tourist attraction, and expedition style guided climbs have become the norm. In a recent interview, Jim Whittaker discussed the differences between climbing Mt. Everest 50 years ago and doing it now. You can see the interview here.

Wood Trekker Social Media – Google Reader Update

$
0
0

By now you guys know that I am horrible when it comes to dealing with computers, or even answering my email for that matter. The only reason why I have been able to keep this blog going is that Blogger offers a very easy template for posting. However, I still know almost nothing about any of the details of how any of this works.

As a result, when people in the IT world decide to mess around with things, it makes life very difficult for me. Recently Google announced that they will be shutting down their Google Reader service that many people use to subscribe to blogs, including Wood Trekker.

What does that mean to you?

Well, if you have no idea what I am talking about, it probably doesn’t matter to you. If you get to the blog through a book mark, a search engine, or some other means, then this probably does not effect you.

The people who will be effected are the ones who get blog updates from Google Reader. If you are not sure what that it, Google Reader is one of many e-readers that allow you to subscribe to blogs (the post feed from the blog) and then have the links and updates compiled in one location-the reader. You could have subscribed by manually adding the RSS feed to your reader, or by clicking the “Join this site” button in the “Followers” box on the side of the blog. Well, it is this feature that Google is disabling. If you use Google Reader, and you want to continue getting the feed, you will need to take some steps.
When will it happen?

Google Reader will stop operating in July 2013, about three months from now. If you use the service, that gives you an opportunity to switch services.

What should I do?

What you should do depends on whether or not you use the service. Like I mentioned above, if you get to my blog through a link, book mark, or a search engine, then you can keep doing what you are already doing. The blog itself is not going anywhere. Currently I have 265 subscriber, but get on average 3000 visitors per day, so it looks like most people already use means to visit the blog other than Google Reader. 

If you use Google Reader, and want to continue to use a similar service, you will need to change to a different reader.

I need to change to a new reader. How do I do it?

As I mentioned earlier, I am frighteningly incompetent when it comes to dealing with computers and tech related issues. However, I really value you guys as readers, and I appreciate that you continue to visit my blog despite my obnoxious style of writing and abrasive personality. So, I figured I would try to provide a solution so those of you equally technologically unsophisticated can give it a try.

Step One: Notice changes to the blog

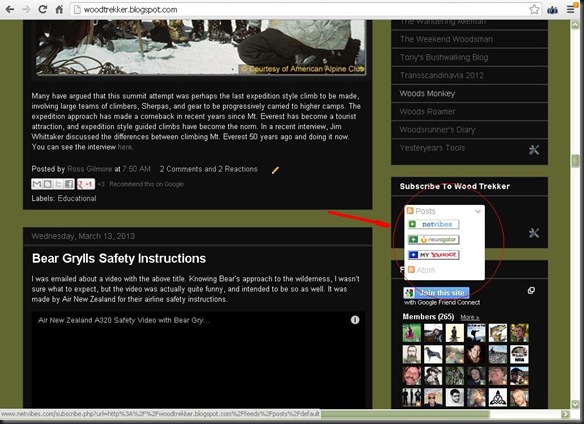
I have made some minor changes to the blog itself, so you can more easily get to the information. The first change is that I have added a “Subscribe to Wood Trekker” box on the side of the blog, right above the “Followers” box, which I imagine will be gone once Google Reader is discontinued. If you click on the “Post” box, you will see a few readers listed with which you can subscribe to Wood Trekker.

16

I have also added a Google + box, where you can follow Wood Trekker on Google +. It can be seen on the side of the blog as well. As always, I still have the box allowing you to follow Wood Trekker on Facebook.

15

Step Two: Select a new e-reader

There are many readers out there which will provide the same function as Google Reader. I decided to use NetVibes because it is the first one listed in the post subscription box I mentioned above. All you have to do is sign up. When you get to the initial NetVibes page, click “Sign Up” in the upper right hand corner.

4-2

Once you have created you account, which requires just an email address, you can log in.

5

You can switch between the above view and the “Reader” by clicking on the “Reader” tab. The picture below shows an empty reader with no subscription.

6-2

If you are just interested in adding one or two subscriptions to your reader, then you are almost done. The only step left is to go to Wood Trekker, or any other blog of your choice, go to the “Subscribe to [Wood Trekker]” box, and select NetVibes out of the drop down menu.

14

Once you have created a NetVibes account, and have subscribed to the blog using NetVibes, you will be able to get the feed from the blog whenever you log into your NetVibes account.

Step Three: Transferring numerous subscriptions

If you are like me, you use a reader because you follow way too many blogs, and it is hard to keep track of them otherwise. If that is the case, it would be extremely time consuming to re-subscribe to each blog individually. Fortunately, there is a solution. In effect, you will have to download the feed from Google Reader, and then transfer it into NetVibes, or any other reader of your choice.

The first step is to go to Google Takeout. If the link I have provided here does not work, just use the search engine to look up “Google Takeout”. Once you have signed into your Google account, you will see a screen with al of your Google services.

1

From the options at the top of the page, select “Chose services” and then from the listed options, select the “Reader” tab.

2-2

Once you have selected the “Reader” tab, click on the “Create Archive” button. A box showing the progress of putting together the “Reader” file will appear.

7

When you see that the file is 100% created, click on the above box, which will take you to another window showing the created file. On that page, click the “Download” button, which will download the file in zip format in the your download folder.

8

Go to the downloaded file, and unzip it. Once that is done, it is time to go back to your NetVibes account. From the menu, click on “+Add Content” and then on “Import”.

9

When you click on import, select “Chose File”. That will open a menu, asking you to locate the file you wish to import. Find the downloaded and unzipped file from Google Takeout, and keep opening the folder inside the file until you find the one titled “Reader”. Inside the folder there will be a file titled “Subscriptions”. Select it and press “Open”.

11

It will take a few seconds for the magic to happen, but once the feeds are imported, your reader will look something like this:

12

All of your feeds should now be there. If something is missing, you can add it manually or just by re-subscribing to the blog. Going forward, the new posts from each blog should appear in your new reader.

I hope this has been of some help. It’s the best I could figure out from my limited understanding of the subject matter. For more detailed explanation, you can visit the write up by LifeHacker here.

Making an Improvised Pack – The Roycroft Pack

$
0
0

In recent weeks there have been several videos released on YouTube about an improvised pack design, usually attributed to Tom Roycroft. Both Mors Kochanski and Dave Canterbury put out such videos recently. It reminded me of a guest post I had done about two years ago for Brian’s Backpacking Blog. I thought I would share the post here with you. I also encourage you to visit Brian’s blog for additional valuable information.

Backpacking technology has come a very long way in a short period of time. It wasn’t too long ago that most of use were dragging around packs with frames made out of steel tubing and a main compartment made of 1/8 inch thick, just short of bullet-proof, material.

In a matter of a few decades, our packs have become exponentially lighter, allowing us to move faster, go deeper into the woods, and visit locations previously unthinkable.

So, you find yourself on one such adventure. For the past three days you have been pushing into the forest, with each day setting a new personal best for the number of miles traveled. The trail is becoming less and less noticeable with each mile traveled. And of course, that is when it happens; a rock gives way under your foot, you loose your balance, and tumble down the side of the road, right into a patch of huckleberry bushes. You get up and dust yourself off. Luckily you are just fine, but you can’t say the same for your pack. The bushes have ripped it to shreds; the contents of your pack littering the hill. For a moment you start to miss your pack from your glory days as a boy scout-the one with the triple reinforced external frame that weighed 8lb.

You quickly shake those thoughts out of your head. There is no need for such drastic measures. A little bit of improvisation will do just fine. After all, worse case scenario, you can just gather the contents of your pack into your poncho or tarp, and sling it over your shoulder. There is however a way that you can make the trip back home a little bit easier. With just some minimal effort, you can put together a very serviceable backpack for the trip home.

Gather three branches. They should be just thick enough so they don’t bend too easily. Arrange them in a triangle on the ground. The triangle should be large enough so that when the bottom side is placed at hip level, the top corner sticks just over your shoulders, and the remaining two corners protrude on either side of your hips. Mors Kochanski recommends that the two long pieces measure from the tip of your fingers to your armpit, and the short piece from your fingertips to your elbow. That will vary depending on you and the type of load you have. I like the bottom piece to be a little longer than that so that the intersections between the pieces, which can be uncomfortable, are away from my body.

6014777096_25c2728e39_b

Make some crude notches at the places where the branches meet.

6014779590_c33ea2c83a_b

Using some string, or even remains from your pack, lash the branches together. You should now have a strong triangular frame.

6014230369_9d943c1dc6_b

Take the shoulder straps from your, now retired, pack. If they are sawn together at a central point, do not try to separate them. If they are independent straps, tie them together. Place the tied shoulder straps over the top corner of the triangle.

6014222299_f4a10578ea_b

Then wrap them around the two branches and pull them through the frame. That way they will hold the weight of the pack without you having to tie them individually to the frame. Then tie the bottom part of each strap to the corresponding corner of the frame.

6014232649_37a60f0cb8_b

The result is a pack frame, ready for use. This is a good time to adjust it for fit. Loosen and tighten the straps until they feel comfortable. Some basic knowledge of friction knots will go a long way here.

6014222919_834dc1c393_b

6014223411_ec7869b830_b

Now that the frame is ready, we can start working on the pack itself. Pull out your poncho or tarp, and place it on the ground. Arrange your gear on top of the poncho.

6014223987_0cd4bd953c_b

Now, fold the bottom of the poncho over the gear.

6014772882_d3314b03b0_b

Then fold the sides, and then the top. We are now ready to connect the pack to the frame.

6014774182_0ddccbd477_z

For a small pack, one that is going to be somewhat smaller than the frame, I like to create a net on the frame so the pack is supported. To do that I simply tie a rope in the center of the bottom branch, and then do a cris-cross pattern going up the frame. The exact design, or for that matter how you tie it makes no difference. As long as there are ropes going back and forth, it will work just fine.

6014231385_9b945d698f_z

Then place the pack on the frame and repeat the same tying process over the pack, lashing it to the frame. Again, the exact pattern does not matter.

6014233629_736f4b1696_b

The one thing I like to do is to not tie the top of the pack, but rather simply tuck in the top flap under some of the ropes. That will allow the pack to be opened so you can get to the contents while you are making your way back home.

6014227853_4ac87c55d0_b

And here is the finished pack.

6014774844_fbefe42ca9_b

If you take some time and adjust the straps, it will be almost as comfortable as an old ALICE pack. Let’s not fool ourselves here. We tend to be very trend sensitive, and there has been talk about this type of pack in recent weeks as if though it is the next great innovation in backpacking technology. It is not. I would never consider heading out into the woods with this type of pack instead of a proper modern pack. For me this is an emergency technology to be used when the need arises.

As they say, knowledge weighs nothing, but a pack with a steel frame weights 8lb. Well, they don’t say that, but they should. Some know how and improvisation can allow you to leave the weight of that bomb-proof pack behind, and trust that on the rare occasion where the need arose, you would be equal to the task.

The Business of Being a Mountain Man: Eustace Conway vs. The Building Inspector

$
0
0

If you make a habit of following outdoor related TV shows, you probably remember Eustace Conway and his Turtle Island household from the History Chanel show Mountain Men. As he is described on the show, Mr. Conway has been living on his 1,000 acre property in North Carolina in what could be called a traditional manner. He claims that he lives off the land, hunting and growing much of his own food, that he makes pants out of buckskin and stitches his own wounds.

608-QgfPM.AuSt.138

In a dramatic climax of the show, Eustace Conway had to fight with the government over unpaid taxes, riding into town on a horse to city hall. Many viewers at the time pointed out that the image of Mr. Conway being portrayed does not seem to align too well with the facts about him. It was quickly pointed out that far from being an isolated mountain man, foraging the forests for resources, Mr. Conway was running a rather profitable business. A visit to his website here, reveals a well organized commercial enterprise with a “mountain man” theme, involving, carriage rides, classes, summer camps for both children and adults, etc. Prices can range anywhere from $65 for a carriage ride, to $1400 for a two week summer camp. It seemed unclear what someone who is living off the land is doing with all that money, and in particular why he is not paying his taxes.

Well, I’m sure we’ll get some more entertaining developments with respect to his taxes in the next season of the show.

A more recent development has been that last Fall, presumably because of increased attention due to the TV show, state officials, acting on a tip, performed an inspection of Turtle Island, and promptly shut it down for not complying with a multitude of health and safety regulation. Some of the violations range from failing to meet building codes, to failing to provide proper sanitation.

Much of the bushcraft community has been in an uproar about this, and the issue has been framed as one where “The STATE” has come to interfere with this man’s life and stop him from living his simple, traditional lifestyle.

I generally ignore such drama, but I wanted to post on this issue as I feel it is being greatly mischaracterized.

Despite the assertions to the contrary, the state government is not seeking to stop Eustace Conway from living his chosen lifestyle. Turtle Island is his property, and he can live there as he chooses, even if that entails him sleeping under a tree. While Turtle Island is currently closed to customers, Mr. Conway continues to live there in his chosen manner.

The real issue here is that Mr. Conway is operating a business at the premises that is open to the public. The moment he starts doing that, he has to comply with health and safety regulations just like anyone else if he wishes to operate that business. 

turtle-1

If he is going to run a camp for children, and for that matter adults, and is going to have them live there, he can not house those people in buildings that do not meet safety and health requirements. If he is going to feed people at the premises as part of a commercial enterprise, then he has to comply with health and sanitation requirements. He can not circumvent those requirements, no more than a restaurant can circumvent health and sanitations standards by saying it specializes in authentic 19th century foods. It can serve 19th century food, but it still has to refrigerate its meat, sanitize its cleaning surfaces, and be free of rats. Similarly Mr. Conway can teach traditional living, but he still has to offer facilities that protect the lives and health of his customers.

It may in fact be the case that it is impossible to teach “true” traditional living these days because of existing regulations. I have to say, I am perfectly okay with that. There are certain aspects of traditional living I would happily give up, including dysentery, dangerous living and working conditions, high child mortality rate, and so on. 

Imagine that instead of the current headlines reading “Mountain Man Takes on Building Codes”, it read “After the State Department Failed to Act, a Dozen Children Were Killed in a Building Collapse at Turtle Island”. What would we be saying then?

Being a mountain man is one thing. Making a business out of being a mountain man is a different story. We shouldn’t confuse the two. All that has currently been shut down is Mr. Conway’s mountain man business, not his lifestyle as a mountain man. Making money comes with certain obligations. As Watauga County Commissioner Perry Yates pointed out, it is not Mr. Conway’s primitive methods, but rather his less primitive ones that are the problem.

A Failed Summit Attempt of Mt. Everest and the Future of Alpinism

$
0
0

Last week I posted about the first successful summit of Mt. Everest by an American team. I also mentioned in the post that some have argued that the 1963 expedition marked the last expedition style mountaineering attempt.

Interestingly, the future of fair means alpinism would be marked by a much less known expedition that took place the previous year, in 1962. It was an attempt to climb Mt. Everest made by a team of four people, climbing without Sherpas, without permits, and without oxygen. The four men were Woodrow Wilson Sayre, Norman Hanseng, Roger Hart, and Hans-Peter Duttle. This American-Swiss team of amateurs managed to get to within 3500 ft from the summit before having to turn back.

4

At a time when mountaineering in America was little known, these four (what many at the time would consider amateurs), would take on the highest mountain in the world and come frighteningly close to conquering it. More importantly, they would do it in a way that the mountaineering community at the time considered impossible.

Just to give some perspective, in 1954, when Woodrow Wilson Sayre and Norman Hanseng applied to go on a winter climb of Mt. Washington, organized by the Appalachian Mountain Club (AMC), they were rejected because they did not have sufficient experience. The two men’s response was to go climb Mt. Denali that year, and then plan a summit attempt of Mt. Everest. 

1

2

In 1962, pretending that they will be making an attempt at the Gyachung Kang mountain, the four men, carrying their own equipment and gear, snuck into China occupied Tibet, to make an attempt on Mt. Everest from the North, the route pioneered by Mallory and Erving in their failed attempt, and at that time still unclimbed. The men had no support, no Sherpas, and no oxygen. The Sherpas and government liaison who transported equipment in the forests, were left at base camp to wait for the team’s return, as they snuck into Tibet. In Sayre’s words, “We made three basic decisions in planning for Everest. We were going without permission, we were going without Sherpas, and we were going without oxygen.”

It appears that the team’s success was in part due to the progress in mountaineering occurring at that time. In his book, Four Against Everest, Sayre writes: “The usual reply to these drawbacks [lack of Sherpas] is to argue necessity… The loads are simply too heavy. Here is where the modern lightweight equipment has changed matters. I would guess that a climber fully dressed against the cold today is carrying 15 to 20 pounds less than his counterpart was carrying forty years ago; that is, his lighter boots, his down-filled parka and pants, his aluminum canteen, and pack frame, and innumerable other improvements, weigh 15 to 20 pounds less than what a climber used to need in order to stay warm. Mufflers and heavy sweaters snowball the weight very quickly. And incidentally, today’s climber is far warmer in spite of the lighter weight. Thus, if he carried a 30 to 35 pound pack, he would not really be carrying more on his person than a climber in the 1920s was carrying when he lifted a 15 to 20 pound pack. This means that today you have, as it were, a built-in Sherpa…

3

At 25,400 ft, 3500 ft below the summit on the North Col, out of food, and suffering from injury, the men decided to turn back.

Upon their return, they were soundly criticized by the mountaineering community for risking a spark in the Cold War by infiltrating the Chinese border, as well as for doing what was considered impossible.

Ironically, the style of alpinism used by Sayre and his team would prove to be the method of the future. Small teams of men, unsupported, and climbing by fair means, would become the aspiration of generations of mountaineers.

A good account of the expedition can be seen in an article by Maurice Isserman titled “Wired: Mad, Ill-Equipped, and Admirable: Everest 1962

Also, if you are able to find it for a reasonable price, as it is out of print, Sayre’s book, Four Against Everest is an excellent read.


DIY Ultralight Fishing Rod Case

$
0
0

Some time ago I noticed that Backpacking Light was selling an ultralight fishing rod case on their website. For some time now, I have been trying to come up with a lightweight, full size fishing kit. Unfortunately my fishing rod had come with a good, but very heavy case. Naturally, I got excited about the ultralight case offered by Backpacking Light. Unfortunately, they were out of stock, and continue to be so as of the date of this post. So, I set out trying to make my own. This was the result:

015

Next to the fishing rod case, you can see my lightweight reel and tackle. Together they make for a fishing kit of under 1 lb total weight, but that is for another post.

I made the fishing rod case from a fluorescent light tube protector. They are available in hardware stores, and come 4 or 8 ft lengths together with the caps you see above. The use of these tubes, as the name designates seems to be to place the fluorescent light bulb inside it for protection.

The tube I used is a bit over 1.5 inches in diameter. It is designed for fluorescent lights that are 1.5 inches in diameter, so that is how they refer to it in the hardware store. More specifically, it is the protector tube for T12 fluorescent lights. There are also tubes in 2.25 inch diameters, for the T17 fluorescent lights, but I was not able to find one.

The 1.5 inch diameter tube weighs 0.7 oz per foot of length. I used about a foot and a half for the above container, which came out to 1.0 oz. Additionally, each of the caps weighs 0.1 oz, for a total weight of the above fishing rod protector of 1.2 oz. Of course, the exact weight will depend on how much of the tube you use. I used a pair of scissors to cut the tube, which wasn’t a problem.

There are however some issues with the protector; some general, and some specific to my set up.

The general issue is that the protector is not terribly strong. While it has worked very well to protect my fishing rod so far, it is not as strong as the protectors you can get from your fishing equipment supplier. The tube is strong enough so that it will not bend in half without very large force being applied, and it will protect very well against branches and other things that may hit your pack while you are raveling in the woods. However, the tube can compress when pressure is applied, so it will not protect your rod is you do something like step on it.

070

The second issue is the one specific to my set up, and that is that the butt guide on the rod was too large (sticks too far out from the rod) to fit in the 1.5 inch tube. I’m sure that would not be an issue with some other rod models, but it was with mine (St. Croix 6 foot Travel Spinning Rod). Unfortunately, since I was not able to find a larger tube, I had to figure out a way to make it work. The solution was to use the flexibility of the tube to my advantage.

The solution was to cut out a small slot, just large enough for the guide to pop out from it when that section of the rod was inserted in the protector. To insert the rod, I pinch the tube so that elongates, and slide the section of the rod until the butt guide reaches the cutout. After that section is in, the other sections are inserted easily.

033

The result was a very lightweight and compact fishing rod case, certainly much lighter than the one that came with the rod. I was also able to find some sources on the internet that sell similar tubes in different diameters. You can see one of them here. I have not ordered from them, so I’m not sure how they match up.

037

Why bother with any of this? Well, it was important for me because just like with most other things I do in the woods, I want to be able to do it while backpacking through the woods over relatively long distances. I could easily end up bringing my fishing gear on a trip, and not using it because the opportunity did not present itself. Because of that, I need fishing gear that is as light as possible so that it is easily portable in that context.

I’ve also noticed while doing research, that many people who do the same thing, and reduce the weight of their fishing gear, switch over to Tenkara fishing. I wanted to stick to spin fishing since my knowledge is limited and I want to master the basics before switching styles. On a similar note, I decided to carry a full fishing kit (rod, reel, and tackle) instead of the hobo fishing kit that I have previously used on trips because I wanted to get better as a fisherman and practice different techniques.

And finally, I know very little about fishing when compared to most other people, so when I give any advise, please ignore it.

Free Tree Identification App for Your Android Phone

$
0
0

Recently I bumped into a pretty good tree identification app for my Android phone. I’m sure there are similar ones for iPhone devices, but since I use an Android phone, it is the only platform to which I can attest.

The application is called Virginia Tech Tree ID, and you can download it to your phone from the market, or you can take a look at it here on your computer.

unnamedunnamed (1)unnamed (2)

The app is free, and it is pretty good. You can do a number of different searches, including using the GPS to find trees in your area, or searching by specific features of the tree. When you install the app, it asks you to download all of the content onto your phone. Once that is done, you can access the information even when you have no connection, which is more often than not the case in the woods.

I haven’t had the app for long, but figured I would give you the heads up. It seems like a useful tool.

Trip Report: Learning to Fly Fish 3/30/13

$
0
0

With trout season starting in April in my area, I’ve been trying to get some more skills when it comes to fishing. The reality is that my abilities in that department are disturbingly sub par. Recently I’ve decided to change that. Well, a friend of Mine, Rich (Mibuwulf as you may know him from Blades and Bushcraft) and I decided to spend the weekend doing some fishing. The plan was to go to Carmans river fish on Saturday, camp overnight, and do some more fishing on Sunday. Since the season would not start for two more days, we were going to catch and release only.

When we got together in the morning, Rich had decided that it was time for me to learn how to fly fish. While I have messed around with spin fishing before, I had never fly fished. Rich was a good teacher however, and once we got to the river, he quickly put me to work at a lower section of the river.

039

043

As Rich explained, in this area we have a self sustaining population of brook trout. The DEP also stocks rainbow and brown trout each year. In the early part of the day, we fished close to a dam where there was a large population of stocked rainbow trout. Pickings were easy.

031

Soon we were joined by two more friends.

075

086

After a while we decided to move up the river to look for more challenging populations of native brook trout.

On the way there were several pitcher plants. They are carnivorous, trapping insects in their pitcher shaped flowers and digesting them. I had no idea they could be found this far north. I always imagined they were a more tropical plant, but apparently not.

136

139

When we were traveling to our new location we spotted a swan which at first glance appeared to be dead. It was on its back and not moving. Upon a closer look though, it was alive, and apparently trapped in the underbrush. The guys got to work setting it free.

111

The swan had been trapped there for quite some time and had a very hard time walking once it was set free. We carried it to the river, where it started swimming. We didn’t see it dead for the rest of the day, so I assume it made it.

128

Once we reached the upper part of the river, Rich was able to locate a population of brook trout, and we were able to catch them quite successfully.

148

146

Unfortunately, we decided to call off our plans for overnighting. Both Rich and I were recovering from being sick this past week, and I in particular was not feeling well. We decided to pack up and go home. Not to worry, fishing is just starting for the year, so we’ll have plenty more opportunities. Big thanks to Rich for showing me the ropes. To see some awesome fly fishing in Patagonia, check out Rich’s YouTube channel here.

Kovea Stoves Finally Introduced on the US Market

$
0
0

This past year you saw me do an initial and long term review of the Kovea Spider stove. Kovea is a Korean company, and until now, their products were not being directly sold in the US, despite the fact that Kovea does the manufacturing for many other, more well known brands like MSR. It was possible to buy directly from the Kovea eBay store, but you no longer need to do that.

15433

Starting this month, at least one US distributor will be selling Kovea products, and hopefully with more to come. Currently, you can purchase the Kovea Spider from The Gear House. A few days ago they also had available the Kovea Alpine Pot stove, a Jetboil variant, but seems like they are already sold out. Hopefully that is a sign that the products are selling well and make it worth for Kovea to expand into the US market.

The reason I say that is because I have been very happy with the Kovea products I have tested, and in particular with the Spider stove. Kovea products also tend to be much more affordable than alternatives like MSR and Primus, without sacrificing quality. I hope to see more Kovea products on the US market soon.

The NY SAFE Act and Its Impact on Hunting Regulations in New York State

$
0
0

I realize that by virtue of the fact that the issue is limited to New York State, this post will have limited reach. I apologize for that, but it has been a big issue here in NY, so I wanted to address it. For those of you who have been following the issue, recently New York State passed a piece of legislation which limited certain gun use and possession. The legislation is called the NY SAFE (Secure Ammunition and Firearms Enforcement) Act.

The act has been thoroughly criticized for being rushed through and very poorly thought out. As its claim to fame the act boasts to be the first such act since the recent mass shootings. I suppose the political brownie points that come with passing the first such act makes up for the fact that very little though was actually given to the provisions it contains. Since the passing of the act, Governor Cuomo has had to hold several press conferences stating that different parts of the act will not be enforced and will be suspended until they can be rewritten. I’ll discuss some of them in this post.

007

Before I get into the post, I want to point out two things that you should keep in mind while reading:

The first is that I am only discussing the NY SAFE Act in the context of how it effects hunting in New York State as this is an outdoor blog. There are other provisions of the act that may or may not effect you as a gun owner. Similarly, there are provisions that deal with reporting for mental health facilities, changes to the way gun dealers have to do background checks, etc. I will not focus on those parts of the act in any detail as they do not relate to hunting.

The second is that none of this should be construed to constitute legal advise. This is just my understanding of the provisions. I am in no way an expert or qualified to speak on the subject. If you have a question about the legality of your weapon, please contact an attorney in your jurisdiction. Also keep in mind that certain large cities like NYC have additional regulations, and most likely those regulations are already more restrictive than the ones in the NY SAFE Act.

The NY SAFE Act is a piece of legislation which serves to amend the gun control laws already in existence in New York State. The act contains thirteen provisions, ranging from increasing the penalties for shooting a first responder, to requiring you to report a lost gun within 24 hours. In my opinion there are two provisions which potentially effect a gun owner in the state who uses his guns for hunting.

Restriction of Magazine Capacity

The laws in New York State prior to the SAFE Act more or less followed the Clinton Assault Weapons Ban. Magazine capacity had been limited to 10 rounds, and older 30 round magazines were allowed to be in use. The NY SAFE Act bans all magazines with a capacity larger than 10 rounds, no matter when they were manufactured. The language of the act also prohibits the purchase and use of any magazines with a capacity of more than 7 rounds. 10 round magazines that were purchased prior to the act would be allowed to remain in use, but can only be loaded with 7 rounds.

Now, this is one of those provisions that was not thought out at all and was written by people who have never seen a gun. Shortly after Governor Cuomo signed the act into law, someone pulled him to the side and explained to him that there are virtually no 7 round magazines on the market. As a result, Governor Cuomo had to hold a press conference and state that this provision of the NY SAFE Act is suspended. Somehow in his mind that did not invalidate the provision, but rather made it into a new regulation where you can now purchase and own old and new 10 round magazines, but you can only load 7 rounds in them. I was skeptical of this, but on the New York State website, the change is clearly written. I took two screen shots which confirm this.

2

1

The second screen shot answers a question specific to the Ruger 10/22, one of the most popular .22 rimfire rifles, which has a 10 round magazine. The absurdity of rendering such a popular small game hunting gun inoperable by not allowing magazines for it to be purchased was too absurd, and necessitated the above change.

I should point out that the above capacity restriction does not apply to tube magazines for rimfire rifles. So if you have something like a Marlin XT-22 with a tube magazine, you can load more than 7 rounds.

As a side note, Governor Cuomo then had to hold a second press conference where he had to assure outraged police officers that the act will not apply to them. As it is written, the NY SAFE Act does not exempt NY police officers from the magazine capacity restrictions. This is clearly another absurd result of a poorly thought out and rushed piece of legislation.

So, how does this directly effect hunting in New York State? Well, in all honesty, it only effects you if you hunt with a .22 or .17 rimfire rifle. In New York State, all centerfire rifles are already limited in the number of rounds they can carry to 5 in a magazine plus 1 in the chamber for a total of 6 rounds. Shotguns, due to federal waterfowl regulations, are plugged so they can only hold a maximum of 3 rounds, 2 in the tube and 1 in the chamber. The only guns that were exempt from these regulations were .22 and .17 rimfire rifles. Technically, you could carry such rifles with higher magazine capacity. They are the only guns in the hunting context that are effected by the magazine capacity regulations of the SAFE Act.

To summarize, if you hunt with a centerfire rifle or a shotgun, the hunting regulations already limit the rounds to below what the NY SAFE Act requires. In that sense you should not be effected. If you hunt with a .22 or .17 rimfire rifle, then you will be effected in that you can only use a maximum 10 round magazine, and it can in turn only be loaded with 7 rounds.

Restriction of Assault Weapons 

So, what is an assault weapon? The reality is that an “assault” weapon is a weapon that a politician who has never held a gun would consider to look scary when he seen it in a catalog. As a result, the classification of assault weapons has very little to do with what a gun owner would consider an assault weapon. Be careful, you have to follow the regulations as they are written, even if they make no sense. As an example, let’s take a look at the picture below.

3

The picture shows two Ruger 10/22s, the rifle we were discussing earlier when talking about magazine capacity. The top rifle is the stock version of the Ruger 10/22, while the lower rifle has had several after market modifications. The second one is an assault weapon in New York State, but the first one is not. Why? If you guessed that it’s because of the addition of a heavier barrel or a high power scope, you would be a reasonable person, but you would be wrong, because you have failed to apply the “Does it look scary to a person who has never held a gun” test. The feature that actually makes the second rifle an assault weapon is the hole you see in the stock of the gun. Someone in the senate decided that if there is such a hole where you can put your thumb through the stock while holding the rifle, the whole gun becomes too “assaulty” for a civilian to own without registering it. The lesson-be careful. You have to follow the provisions even if they make no sense.

New York State had a definition for what would constitute an assault weapon prior to the SAFE Act.  NY state law used to define an "assault weapon" as:

Semi-automatic rifles able to accept detachable magazines and two or more of the following:

  • Folding or telescoping stock
  • Pistol grip
  • Bayonet mount
  • Flash suppressor, Muzzle brake, Muzzle compensator, or threaded barrel designed to accommodate one
  • Grenade launcher (more precisely, a muzzle device that enables launching or firing rifle grenades, though this applies only to muzzle mounted grenade launchers and not those mounted externally).
  • Thumbhole stock
  • Foregrip

Any revolving cylinder shotgun or any semi-automatic shotgun with two or more of the following:

  • Folding, telescoping or thumbhole stock
  • A second handgrip or a protruding grip that can be held by the non-trigger hand
  • Fixed capacity of more than 7 rounds
  • Ability to accept a detachable magazine

There are additional regulations that classify handguns as assault weapons, but I have left them out of this discussion.

The NY SAFE Act takes the above regulations which were already on the books and changes the requirement that a weapon has two or more of the above characteristics, into one or more of the above characteristics.

So, after the NY SAFE Act, a semi-automatic rifle or shotgun with one or more of the above features will be classified as an assault weapon. Let’s say as an example that you like to hunt rabbit with your Ruger 10/22. You had tricked it out with a collapsible stock so it is easier to carry on your pack. Well, that would have been legal before, but after the NY SAFE Act, if you don’t want your gun to be classified as an assault weapon you have to remove that collapsible stock.

The reality is that if you use a bolt action or single shot rifle, or a pump action or single shot shotgun, the assault weapons provision of the NY SAFE Act does not effect you. If you use a semi-automatic rifle, then it will effect you if your rifle or shotgun has one or more of the above features. The biggest impact will probably be on people who use .223 rounds for hunting coyote, as your gun is probably an AR 15 variant, which is likely to have at least one of the above features. Most stock .22 and .17 rifles should be fine, but if you have any aftermarket mods, they may fall into the above category. The features most likely to be an issue are collapsible stocks, thumbhole grips, and pistol grips. The fact is they looked scary to the senators. The restriction of grenade launchers, bayonets and silencers (not allowed for hunting in New York State) are unlikely to make much of a difference for a hunter, although you may have to make some modifications to remove features such as a bayonet lug. 

Now, if your gun is qualified as an assault weapon, you will have to register it within a year. I’m not sure what impact that would have. The most significant aspect seems to be that you can not transfer the gun to another owner within the state.

There are some other provisions, like requiring dealers to do background checks for ammunition sales which may make the checkout at Dicks even longer, and having to have all online ammunition purchases shipped to a licensed dealer, which is again a nuisance, but I believe the above two provisions to have the most direct impact on hunter in New York State. Again, if you are uncertain about a particular provision please contact an attorney in your jurisdiction.

General Provisions of the NY SAFE Act(thank you Wikipedia)

If you are curious, here is a general summery of the provisions of the NY SAFE Act:

  • Bans possession of any "high-capacity magazines" regardless of when they were made or sold. See discussion above.
  • Ammunition dealers are required to do background checks, similar to those for gun buyers. Dealers are required to report all sales, including amounts, to the state. Internet sales of ammunition are allowed, but the ammunition will have to be shipped to a licensed dealer in New York state for pickup. Ammunition background checks will begin January 15, 2014.
  • Requires creation of a registry of assault weapons. Those New Yorkers who already own such weapons would be required to register their guns with the state.
  • Requires designated mental health professionals who believe a mental health patient made a credible threat of harming others to report the threat to a mental health director, who would then have to report serious threats to the state Department of Criminal Justice Services. A patient's gun could be taken from him or her. The United States Department of Veterans Affairs has announced that it will refuse to comply with this provision.
  • Stolen guns are required be reported within 24 hours. Failure to report can result in a misdemeanor.
  • Reduces definition of "assault weapon" from two identified features to one. The sale and/or transfer of newly defined assault weapons is banned within the state, although sales out of state are permitted. Possession of the newly-defined assault weapons is allowed only if they were possessed at the time that the law was passed, and must be registered with the state within one year. See discussion above.
  • Requires background checks for all gun sales, including by private sellers - except for sales to members of the seller's immediate family. Private sale background checks will begin March 15, 2013.
  • Guns must be "safely stored" from any household member who has been convicted of a felony or domestic violence crime, has been involuntarily committed, or is currently under an order of protection.Unsafe storage of assault weapons is a misdemeanor.
  • Bans the Internet sale of assault weapons.
  • Increases sentences for gun crimes, including upgrading the offense for taking a gun on school property from a misdemeanor to a felony.
  • Increases penalties for shooting first responders (Webster provision) to life in prison without parole.
  • Limits the state records law to protect handgun owners from being identified publicly. However, existing permit holders have to opt into this provision by filing a form within 120 days of the law's enactment.
  • Requires pistol permit holders or owners of registered assault weapons to have them renewed at least every five years.
  • Allows law enforcement officials to preemptively seize a person's firearms without a warrant if they have probable cause the person may be mentally unstable or intends to use the weapons to commit a crime.

The full act is a convoluted mess, and unless you are accustomed to reading such documents it will take you some time to comb through it. You can find the full text online if you care. Again, if you are not sure about something, contact an attorney in your jurisdiction. You don’t want to be one of those test subjects for the new legislation. The above is just my overly simplistic take on that I have read and found from other sources.

Viewing all 250 articles
Browse latest View live